
Roof Installation: What to Expect
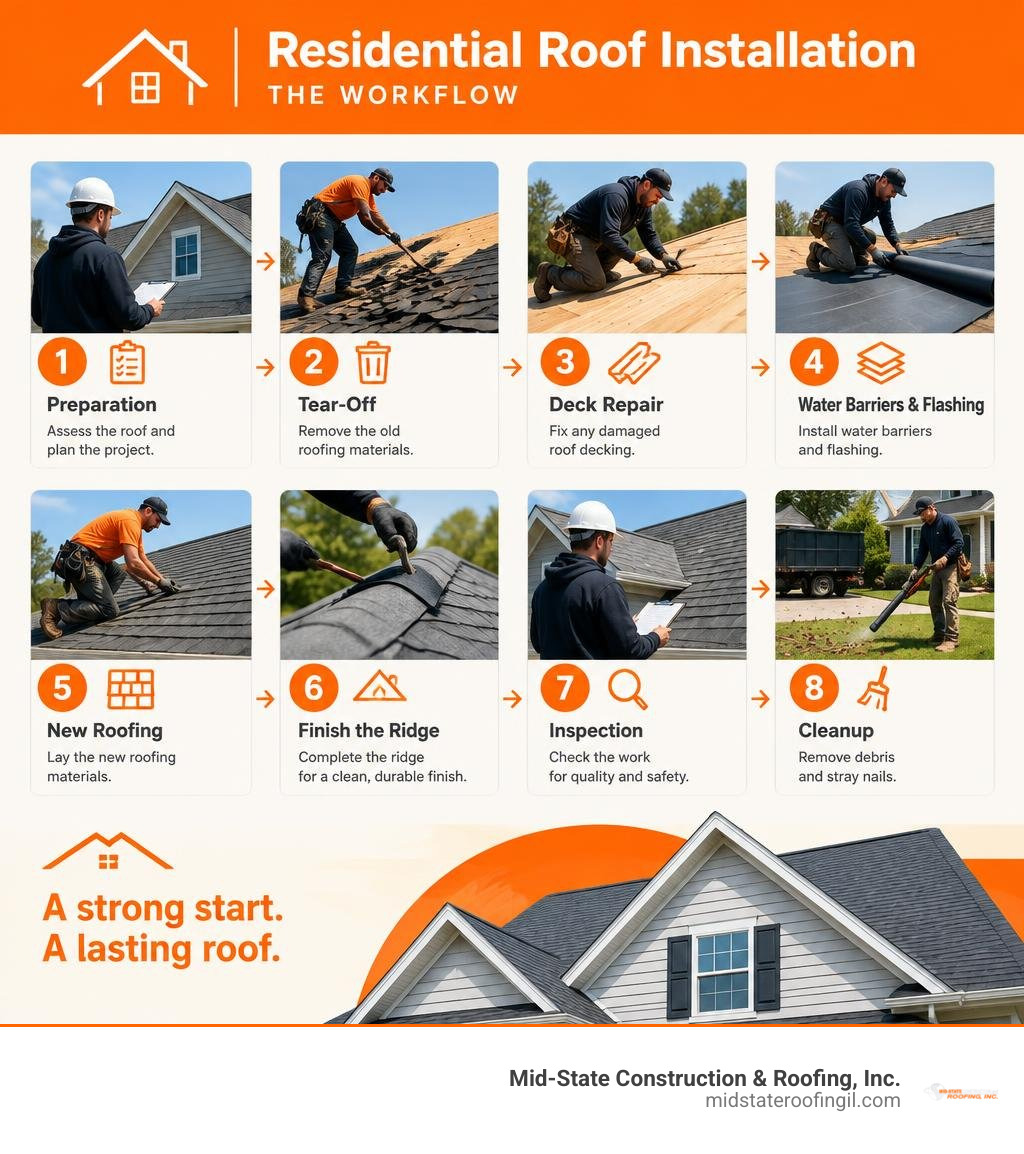
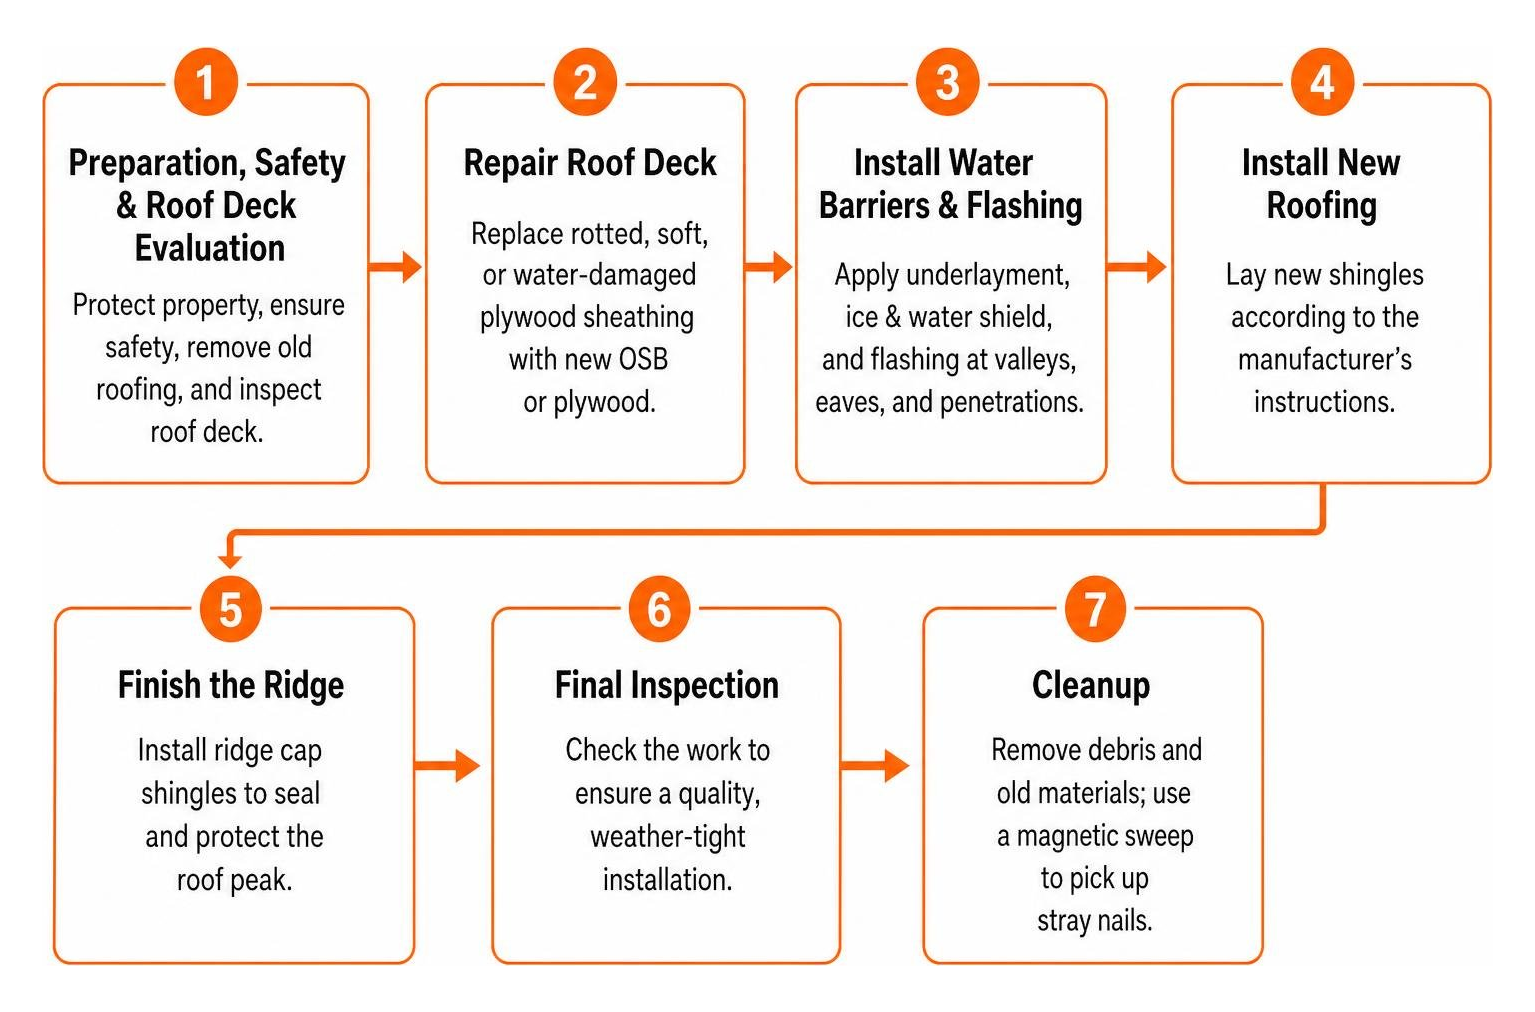
Roof installation starts with a sound roof deck and ends with a weather-tight finish. For a typical replacement, the crew removes the old roofing, repairs damaged decking, installs water barriers and flashing, then lays the new roofing and finishes the ridge. A final inspection checks the work, and a cleanup removes debris and stray nails.
Many asphalt shingle roofs take one to three days to replace. Cost and timing depend on the roof’s size, shape, condition, and materials. In central Illinois, a careful installation also means paying close attention to the areas where rain, snow, and ice can get in.
I’m Virgil Strauch. My background in leadership and project oversight shapes how I explain roof installation: clear steps, sound planning, and checks that help protect the finished work.
Essential roof installation terms:
Step-by-Step Roof Installation: From Tear-Off to Ridge Cap

A comprehensive residential reroof involves an orderly sequence of events designed to protect your home from the top down. Knowing what to expect during roof replacement helps homeowners prepare their property and schedule accordingly. For a standard home of 3,000 square feet or less, an experienced crew can often complete the tear-off in one day and finish the installation on the second day.
Preparation, Safety, and Roof Deck Evaluation
Every successful installation begins before the first shingle is stripped. Proper site preparation requires placing protective tarps over delicate landscaping, moving patio furniture, and parking vehicles away from the driveway to accommodate dumpsters and delivery trucks.
During tear-off, workers start at the ridge and work downward, stripping away old shingles and underlayment down to the raw wood decking. Once exposed, we conduct a meticulous inspection of the roof deck. Rotted, soft, or water-damaged plywood sheathing must be cut out and replaced immediately with fresh OSB or plywood. This structural foundation holds the fasteners; securing new shingles to rotted wood guarantees premature roof failure.
Local building codes also enforce what is known as the 25% rule: if 25% or more of a roof’s surface is damaged or replaced within a 12-month window, the entire roof must often be brought up to current code standards, requiring full permits and certified inspections.
Underlayment, Flashing, and Drip Edge Setup
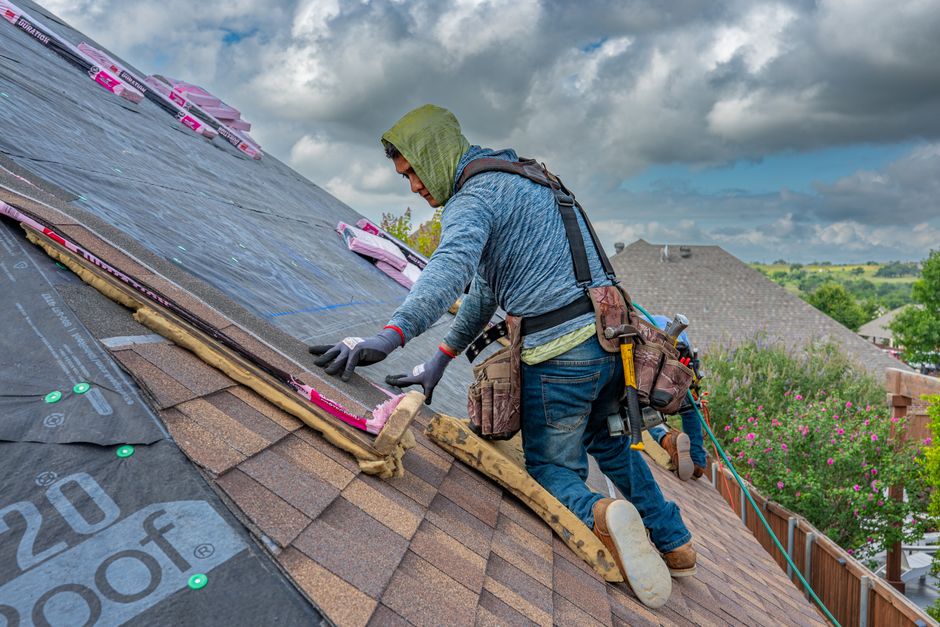
Once the deck is clean and structurally solid, water management layers are applied:
- Drip Edge Installation along Eaves: Metal drip edge is fastened along the roof eaves first to direct water away from the fascia board and into the gutters.
- Ice and Water Barrier: In regions subject to winter freezing, self-adhesive ice barrier membranes are installed along eaves (extending at least 24 inches inside the interior wall line) and along sensitive roof valleys.
- Moisture Barrier Rollout: High-performance synthetic underlayment covers the remainder of the deck. Modern synthetic barriers offer exceptional tear resistance and provide vital secondary moisture defense. Understanding roofing underlayment importance is essential, as this layer shields the wood deck if wind-driven rain ever penetrates the surface.
- Gable Drip Edge and Flashing Details: Additional drip edge is installed along the gable rake edges over the underlayment. Precise drip edge and step flashing installation is completed around chimneys, dormers, and side walls, using corrosion-resistant metal to seal water junctures.
Shingle and Material Application Best Practices
Applying the final surface material requires strict adherence to manufacturer specifications:
- Starter Shingle Courses: A dedicated starter shingle strip is laid along the eaves and rake edges to provide initial adhesive seal points and prevent wind uplift.
- Nailing Depth and Patterns: Fasteners must be driven straight and flush—never under-driven (which punctures overlying shingles) or over-driven (which cuts through the shingle mat). Standard shingles require four to six hot-dipped galvanized nails placed precisely along the manufacturer’s nailing strip.
- Staggered Layout and Exposure: Shingle courses must maintain a proper reveal (typically 5 to 5 5/8 inches) with offset side joints to prevent direct vertical seam alignment where water could track through.
- Ventilation and Ridge Caps: Proper attic ventilation—utilizing continuous ridge vents, box vents, or powered exhausts—is integrated before capping the roof peaks with specially designed ridge cap shingles.
- Magnetic Sweep and Inspection: Once installation wraps up, a thorough magnetic sweep of the perimeter collects loose nails, followed by a final attic and structural inspection.
Planning Your New Roof: Costs, Materials, and Professional Execution
A new roof is a major structural investment that enhances energy efficiency, curb appeal, and resale valuation. According to industry data, replacing an aging roof allows homeowners to recover significant property value—with some remodeling impact assessments showing an average return of 60% to 68% for standard asphalt, and upwards of 100% in overall home marketability.
Comparing Materials for Residential Roof Installation
Choosing the right material involves balancing lifespan, aesthetic style, maintenance requirements, and overall project budget.
| Material Type | Average Lifespan | Maintenance Level | Best Application |
|---|---|---|---|
| Architectural Asphalt Shingles | 20 – 30 Years | Low | Versatile, cost-effective residential protection |
| Standing Seam Metal | 40 – 70 Years | Very Low | High durability, severe weather, modern aesthetics |
| Cedar Shakes & Shingles | 30 – 40 Years | Moderate to High | Natural beauty, historic preservation |
| Slate & Tile | 50 – 100+ Years | Low | High-end architectural durability, lifetime performance |
Homeowners looking for cost efficiency and reliable protection frequently opt for asphalt shingle roof installation, which remains the standard for North American homes.
For property owners seeking multi-decade longevity and superior wind resistance, exploring standing seam metal roofing benefits reveals how concealed fastener systems eliminate leak points entirely. If you want to learn more about panel mechanics, guides on How to Install Metal Roof Panels demonstrate how panel expansion clips accommodate natural thermal movement.
For a complete breakdown of product profiles, consult our guide on choosing the right roofing material.
Key Cost Factors in a Full Roof Installation
The national average to install a standard asphalt shingle roof sits around $9,500, with most residential projects ranging between $7,500 and $16,000 ($4 to $11 per square foot installed). Metal roofing typically ranges from $6,000 to $20,000, while premium slate or tile can exceed $30,000.
Key variables shaping the estimate include:
- Total Roof Area (Squares): Roofing is measured in 100-square-foot units known as “squares.”
- Pitch and Accessibility: Steeply pitched roofs (greater than 6:12 or 8:12 rise) require specialized staging, harnesses, and slower work paces, which increases labor costs.
- Tear-Off Layers: Stripping multiple existing layers of old shingles requires additional labor and disposal dumpsters.
- Underlying Repairs: Replacing deteriorated decking or framing adds minor material and labor fees.
To avoid unexpected surprises, reviewing understanding roof replacement estimates helps you evaluate detailed material lists, labor breakdowns, and warranty protections.
DIY Safety Considerations vs. Hiring a Contractor
While handling a small detached shed or simple low-slope porch might be feasible for an experienced handyman, undertaking a full residential home replacement carries severe risks. Roofing consistently ranks among the most hazardous construction tasks.
- Safety Hazards: Steep pitches, unexpected morning frost, tripping hazards, and heavy shingle bundles (weighing 50 to 80 pounds each) present significant fall risks without certified safety anchors and fall-arrest systems.
- Workmanship and Warranty Integrity: Improper nail placement, inadequate flashing around skylights and chimneys, or poorly sealed valleys are the primary causes of storm leaks. Manufacturer warranties typically require certified installation techniques to remain valid.
- Equipment and Time: Professional crews complete in two days what might take a homeowner weeks of exposed weather vulnerability.
Before making a decision, review these essential questions to ask a residential roofing contractor to ensure any company you consider carries verified licensing, general liability, and manufacturer certifications.
At Mid-State Construction & Roofing, Inc., we provide dependable commercial and residential roofing services across central Illinois, serving homeowners in Effingham, Beecher City, Shelbyville, Altamont, Vandalia, Ramsey, Salem, Hillsboro, and Litchfield. Our dedicated project supervision and strict quality assurance protocols ensure every roof is built to endure the harshest Midwest seasons.
Ready to protect your home with a secure, long-lasting roof? Schedule a thorough, professional assessment directly with Mid-State Construction & Roofing today.