
How to Install GAF StormGuard Leak Barrier
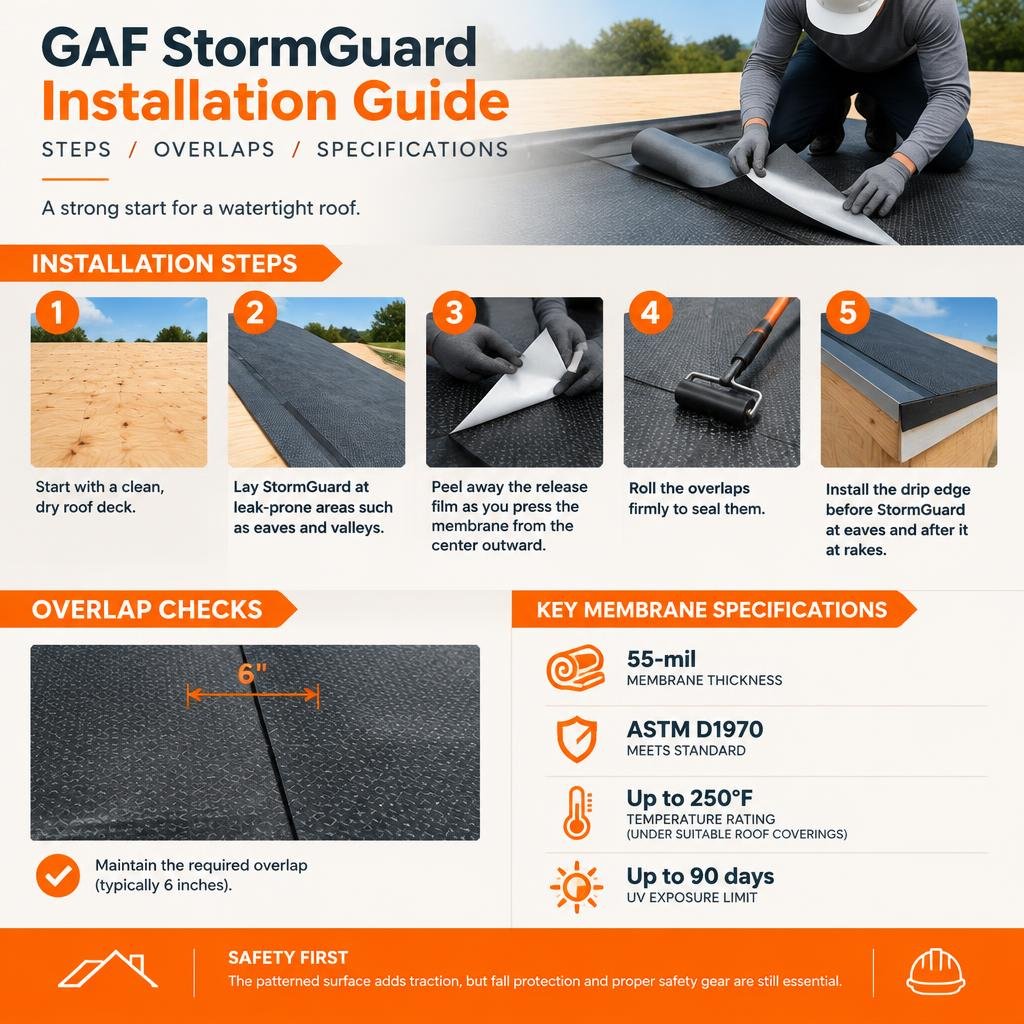
Start with a clean, dry roof deck. Lay StormGuard at leak-prone areas such as eaves and valleys. Peel away the release film as you press the membrane from the center outward, then roll the overlaps firmly to seal them. Install the drip edge before StormGuard at eaves and after it at rakes. Check the current GAF installation instructions before work begins, especially for temperature and overlap requirements.
StormGuard is a self-adhering leak barrier that helps keep water out beneath the finished roof. Its 55-mil membrane meets ASTM D1970 and is rated for temperatures up to 250°F under suitable roof coverings. Its patterned surface adds traction, but fall protection and proper safety gear are still essential. Cover the barrier promptly; its UV exposure limit is up to 90 days.
I’m Virgil Strauch. My experience in planning and overseeing projects shapes this practical guide to gaf stormguard installation, starting with the deck and moving through the details that protect the finished roof.
Basic gaf stormguard installation glossary:
Step-by-Step GAF StormGuard Installation Guide
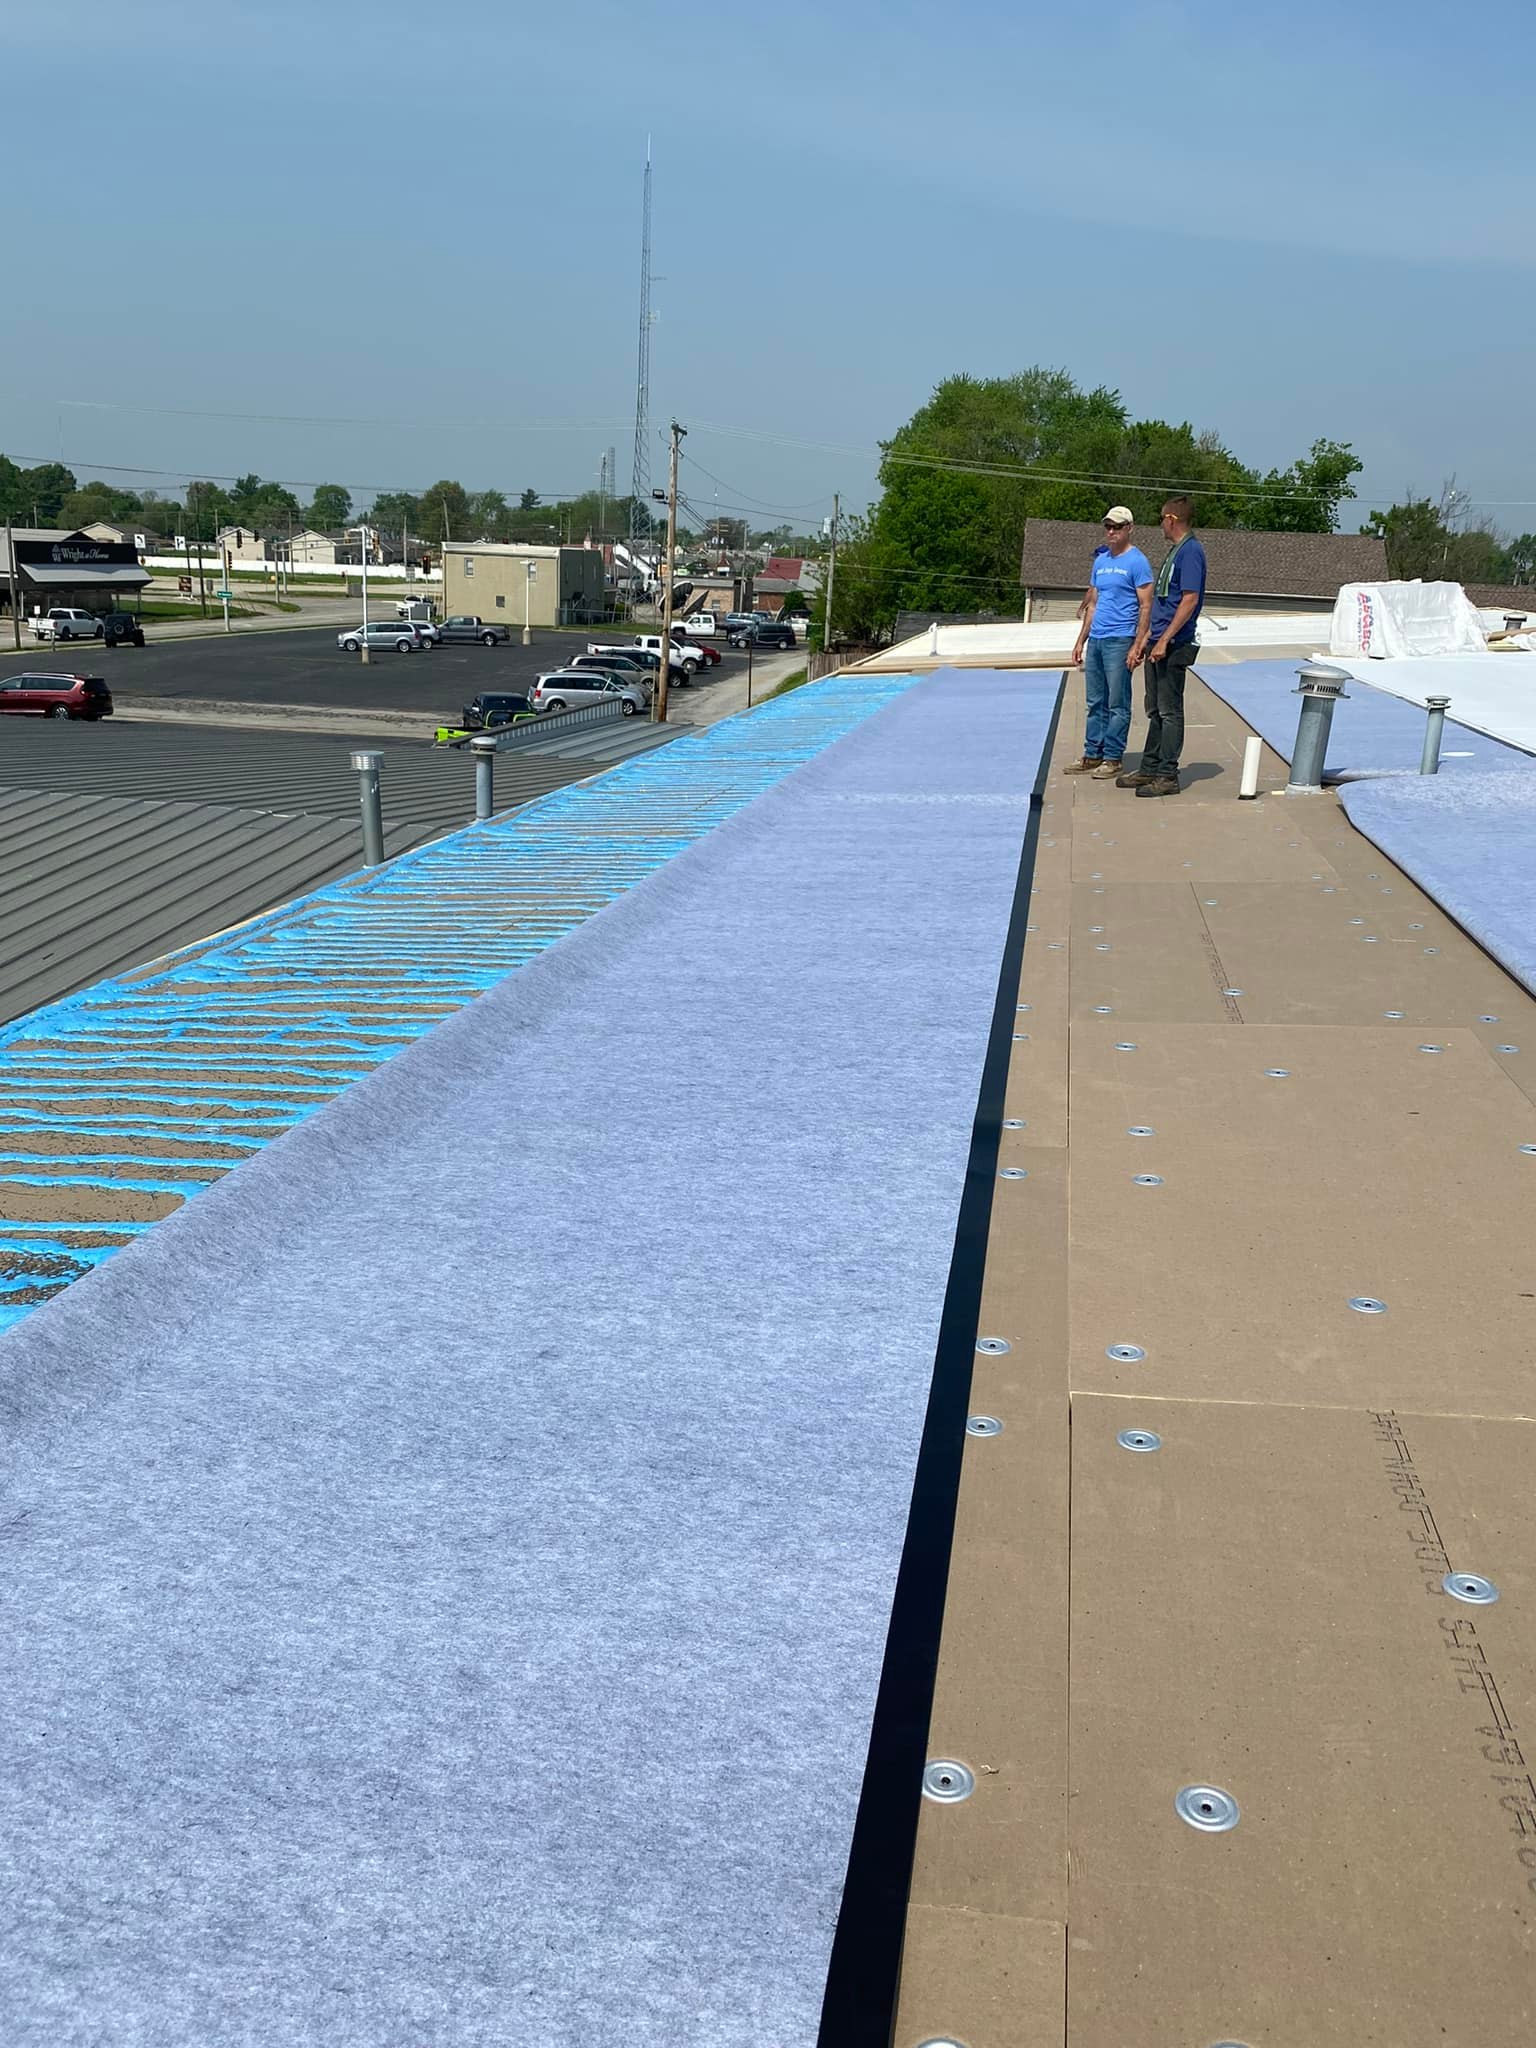
When putting together a top-tier roof, understanding everything you need to know about asphalt shingle roofing means respecting the critical defense layers underneath. GAF StormGuard is an SBS-modified bitumen, fiberglass-reinforced membrane designed specifically for steep-slope applications with a pitch of 2:12 or greater.
Each roll covers 200 square feet, measuring 36 inches wide by 66.7 feet long. Getting maximum performance from this barrier requires following exact steps so that wind-driven rain and ice dam backups never find a pathway into the home.
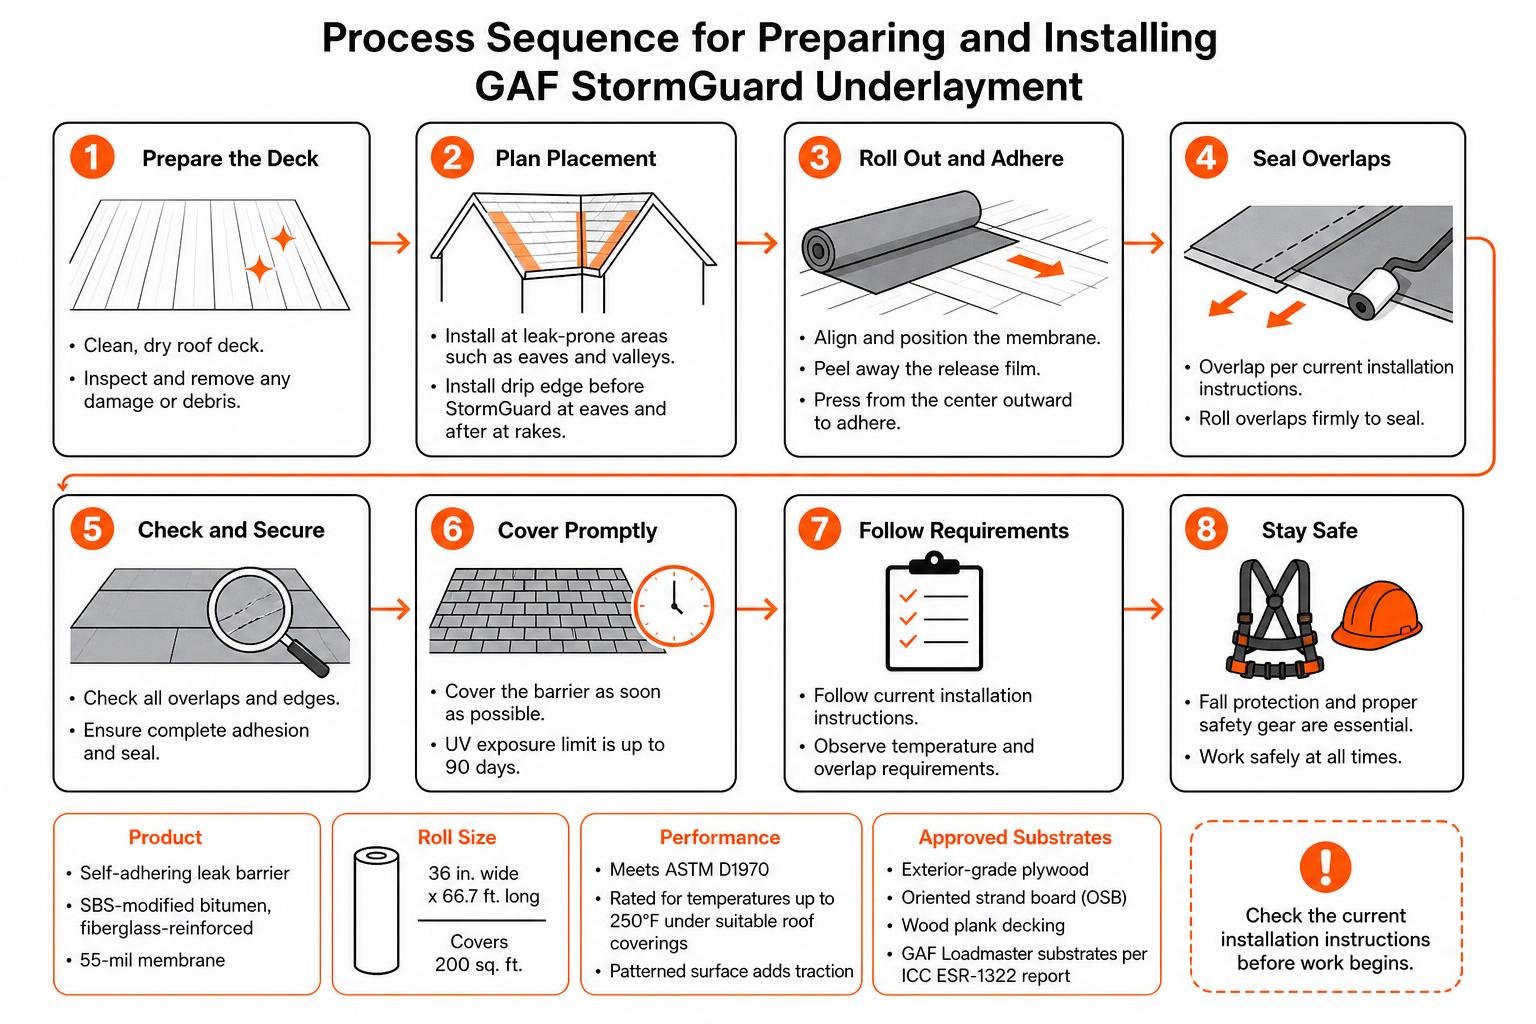
Deck Preparation and Approved Substrates for GAF StormGuard Installation
Before rolling out material, deck preparation is paramount. Knowing what to expect when getting your new roof installed includes a full tear-off and a thorough inspection of the wooden decking.
- Substrate Requirements: StormGuard bonds directly to standard exterior-grade plywood, oriented strand board (OSB), wood plank decking, and GAF Loadmaster substrates per the Weather Watch® and StormGuard™ ICC ESR-1322 report.
- Masonry and Concrete: If applying over masonry or concrete surfaces, prime the dry deck first with Matrix 307 or an ASTM D41-approved primer. Wood substrates do not require priming.
- Surface Cleanliness: Sweep the entire deck clear of sawdust, dirt, moisture, frost, and debris.
- Fastener Flushness: Ensure all nails in the roof deck are driven completely flush. Protruding nail heads will puncture the membrane from beneath under foot traffic.
- Pitch and Resin Watch: Avoid laying the barrier over green or high-resin wood boards (like raw unseasoned pine) without confirmation, as resin bleed can soften asphalt compounds over time.
Step-by-Step Eave, Valley, and Rake GAF StormGuard Installation
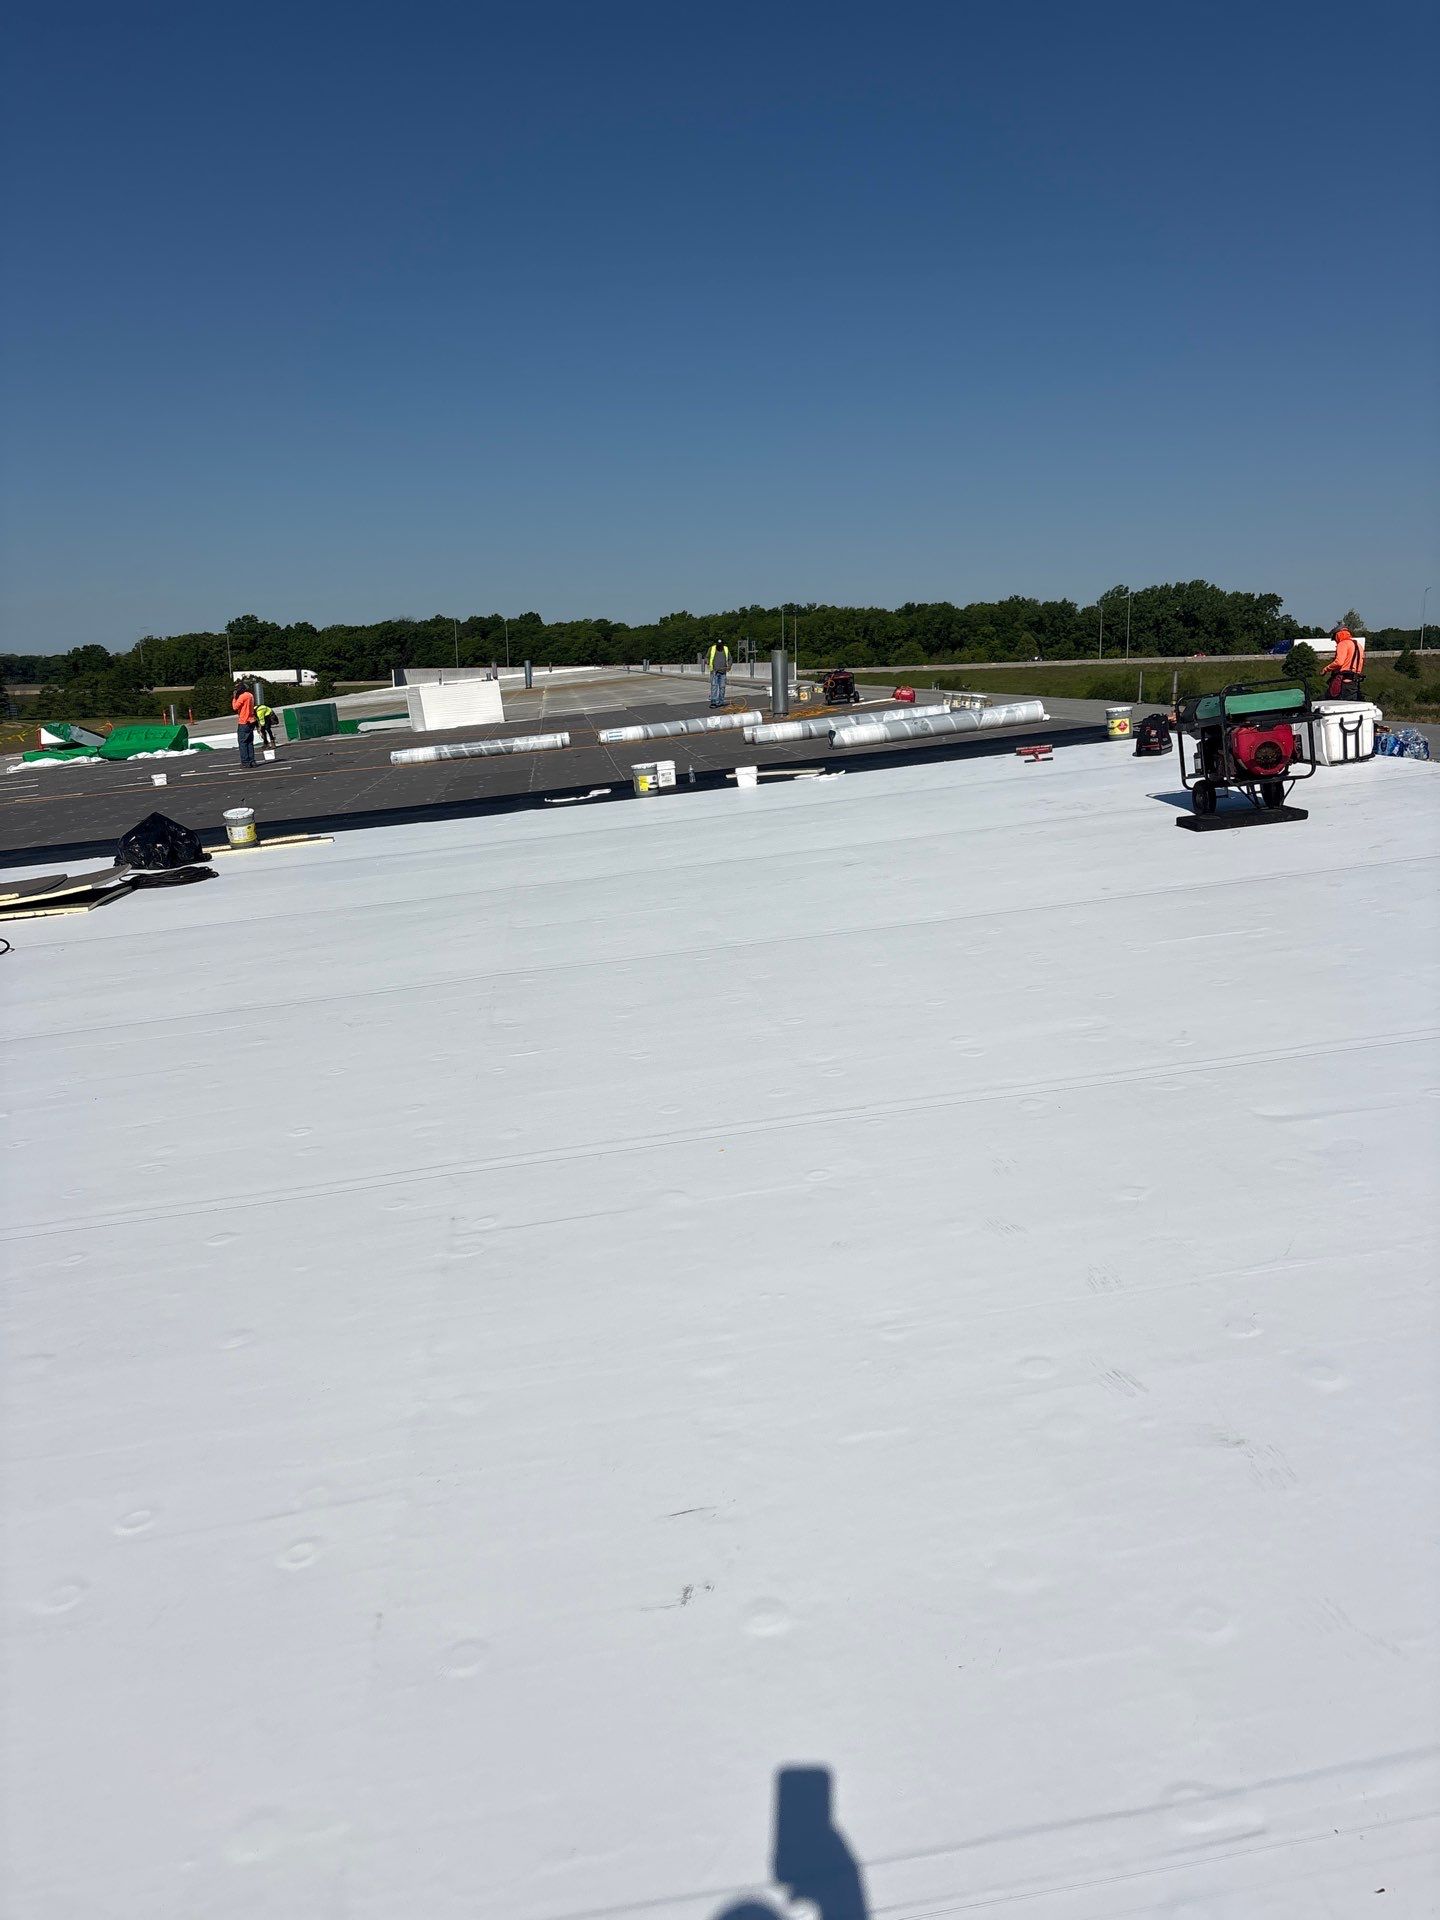
Critical roof junctions demand careful geometric placement:
- Eaves: Install your metal drip edge directly onto the bare wood deck first. Roll StormGuard out flush over the metal drip edge flange. In regions subject to freezing weather, building codes require extending the membrane up the slope so it reaches at least 24 inches past the interior warm wall line of the structure.
- Valleys: Cut sheets into manageable 10-to-20-foot sections. Center the membrane directly down the centerline of the valley. Peel half the release backer, anchor the middle, and work outward toward each edge to eliminate tenting or air pockets.
- Rakes: At rake edges, apply StormGuard directly to the deck edge first, and then fasten the rake metal drip edge over the membrane to secure the perimeter against uplift.
Proper Overlaps, Fastening, and Release Film Removal Techniques
Achieving a water-tight seal comes down to overlap geometry, roller pressure, and installer credentials backed by industry-standard roofing certifications.
- Side and End Laps: Overlap adjacent courses by a minimum of 3 inches on horizontal side laps. End laps between rolls must overlap by at least 6 inches.
- Hand-Rolling: Firmly roll all side and end seams with a weighted hand roller to activate the pressure-sensitive adhesive. For added protection in cold temperatures or high-exposure areas, apply a thin 1/4-inch to 3/8-inch bead of ASTM D4586 roofing cement along end laps.
- Release Film Removal: StormGuard features a split-back release film. In warm conditions, flip the sheet so the white release paper faces upward to pull the backing away effortlessly. In cooler weather, keep the blue walking surface facing up, peeling the lower half of the split backer away while smoothing from center to edge, followed by the upper half.
- Mechanical Fastening: Back-nail the top selvage edge every 18 inches using corrosion-resistant roofing nails to prevent downward slippage before full deck adhesion sets in.
Weather Guidelines and Troubleshooting for Long-Term Protection
Applying self-adhering membranes requires close attention to the thermometer. Under standard conditions, install StormGuard when dry ambient air and deck temperatures fall between 40°F and 120°F.
Once placed, the membrane provides up to 90 days of UV resistance before you must install shingles or metal roofing panels. Performing routine roof inspections during and after construction ensures any incidental site damage gets caught before the final covering goes on. For professional installations across Central Illinois, property owners trust Mid-State Construction & Roofing, Inc. for reliable, manufacturer-compliant craftsmanship.
Cold Weather Precautions and Material Storage
When roofing in late fall or early spring, cool weather alters how asphalt adhesives react. As detailed in the Cool Weather Installation of StormGuard® and WeatherWatch® Leak Barriers guide, low temperatures require special handling:
- Conditioning Materials: Store rolls in a heated enclosure at 55°F or warmer overnight. At the time of installation, the membrane itself must be at least 45°F, even if outdoor air is cooler.
- Shorter Sections: Cut rolls into shorter 10-to-15-foot lengths to handle them before the material chills and loses suppleness.
- Hot-Air Assistance: If laps resist bonding in crisp weather, warm the overlap seams gently with a hot-air gun while applying firm hand roller pressure.
- Immediate Back-Nailing: Always nail the selvage edge every 18 inches immediately to avoid movement and eliminate slip hazards for workers walking the roof.
| Factor | Warm Weather (65°F–120°F) | Cold Weather (<45°F–60°F) |
|---|---|---|
| Roll Storage | Store upright, shaded, below 100°F | Store in heated space at ≥55°F overnight |
| Working Lengths | Full or half rolls (up to 33–66 ft) | Short lengths (10–20 ft maximum) |
| Film Removal | Flip sheet, pull white backer easily | Keep blue side up, peel split liner gradually |
| Seam Adhesion | Instant pressure bond via roller | Use hand roller plus hot-air gun if needed |
| Slip Hazard | Low; patterned film directs sweat away | Elevated; must back-nail selvage every 18″ |
Preventing Mole Runs, Adhesion Failures, and Seam Defects
Improper technique can lead to common installation flaws that undermine roof integrity:
- Mole Runs and Wrinkles: These elongated ridges occur when a long sheet is unrolled unevenly or laid over an unconditioned deck. If a sheet shifts, do not stretch it. Slice open large wrinkles, lay the material flat, and cover the cut with a fully rolled StormGuard patch extending 6 inches in all directions.
- Fishmouth Voids: When end laps are not pressed firmly from the center outward, edge gaps (fishmouths) form. Seal these flat immediately with a compatible elastomeric mastic or an overlay patch.
- Adhesion Failures: Dust, frost, or dew on the decking will prevent the rubberized bitumen from grabbing the wood fibers. Never apply over a damp deck.
- Excessive Solvent Use: Avoid slathering heavy solvent-based roof cements across the membrane body. Solvents can liquefy modified asphalt, creating blisters, leaks, and roof drip stains along the eaves. Maintain neat, measured beads only where specified.