
How to Start a Shingle Roof Leak Repair
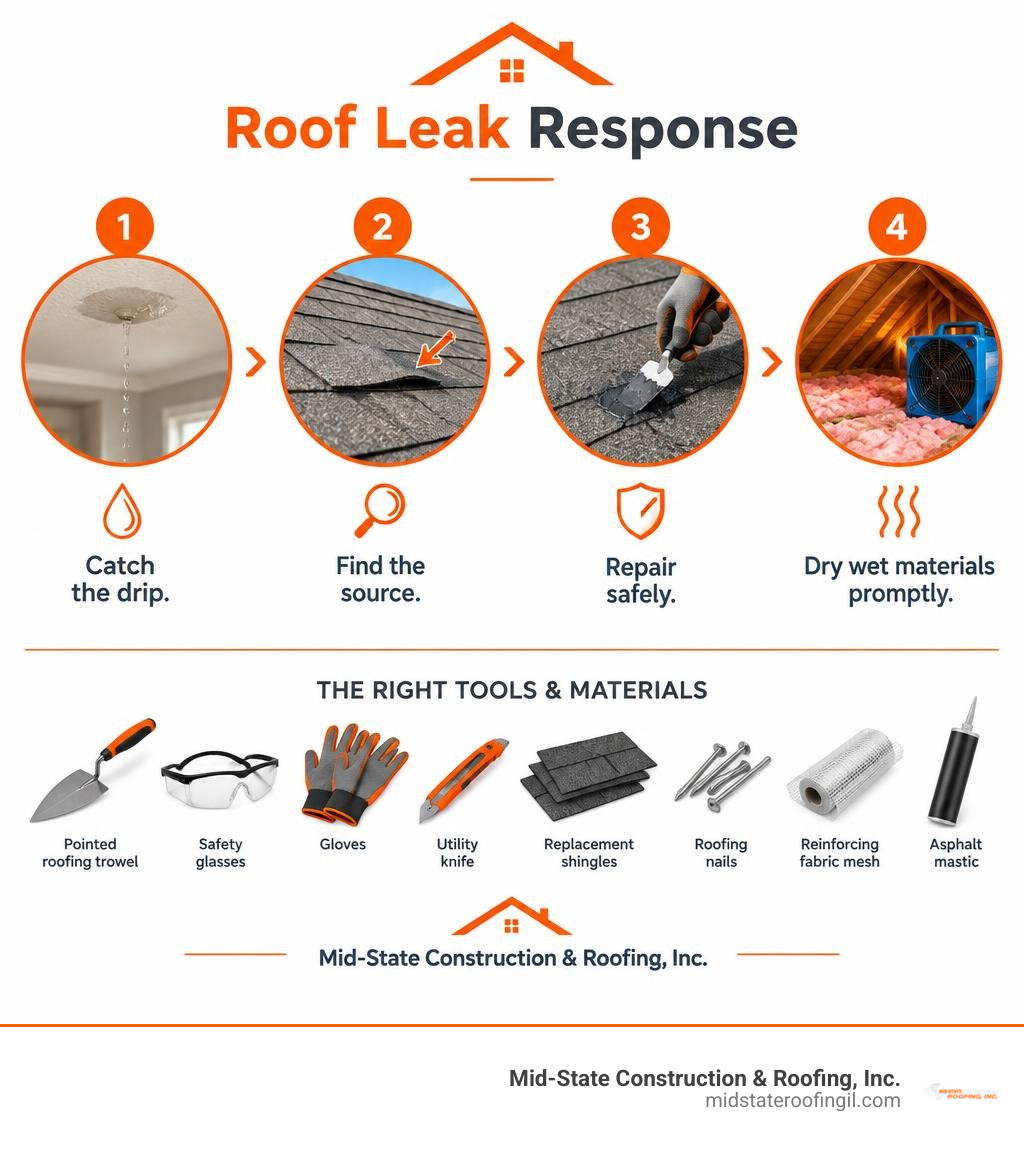
Catch the drip, then find where water enters. Check the attic for a wet trail and inspect the roof from the ground; the ceiling stain may not sit below the damaged shingle. If you find one damaged shingle and can reach it safely on a dry roof, replace it or use a roof-rated patch product as directed. Stay off wet or steep roofs, and call a roofer for storm damage, multiple leaks, or sagging roof decking.
I’m Virgil Strauch. My experience in project oversight and planning shapes this roof leak repair guide: make a safe diagnosis first, then decide whether a small patch is enough.
Step-by-Step Roofing Leaking Repair for Damaged Shingles
Tackling a damaged roof tab or cracked shingle in an afternoon can save your home from thousands of dollars in hidden water damage. Before grabbing your ladder, gather the right materials: a pointed roofing trowel, safety glasses, gloves, a utility knife, replacement asphalt shingles, roofing nails, reinforcing fabric mesh, and an exterior-rated asphalt mastic.

A high-grade rubberized mastic, such as Henry 208R Rubberized Wet Patch, is an industry staple for minor emergency work. With an average 4.5 out of 5-star rating across thousands of customer reviews and a 90% recommendation rate, it provides reliable adhesion. Formulated to perform in temperatures ranging from 0°F all the way to 120°F, one gallon typically covers up to 12-1/2 square feet at an applied thickness of 1/8 inch. While the surface forms a protective skin quickly, full curing takes roughly 30 days.
Diagnosing Water Entry Points and Attic Moisture
Water rarely travels in a straight vertical line. It typically enters through a cracked shingle, runs down the roof decking along a rafter, and drips onto your drywall feet away from the initial puncture. Finding the true source requires careful detective work.
Start your inspection inside the attic during daylight hours. Turn off the attic lights and look upward for daylight shining through the roof boards. Use a flashlight to check the framing for dark drip trails, damp insulation, or water rings around rusty nails. If you find the moisture point, you can consult guidance on Assessing and Repairing Leaky Roofs to safely map the intrusion. Pushing a small wire or finishing nail up through the decking hole helps you mark the exact spot on the exterior roof surface.
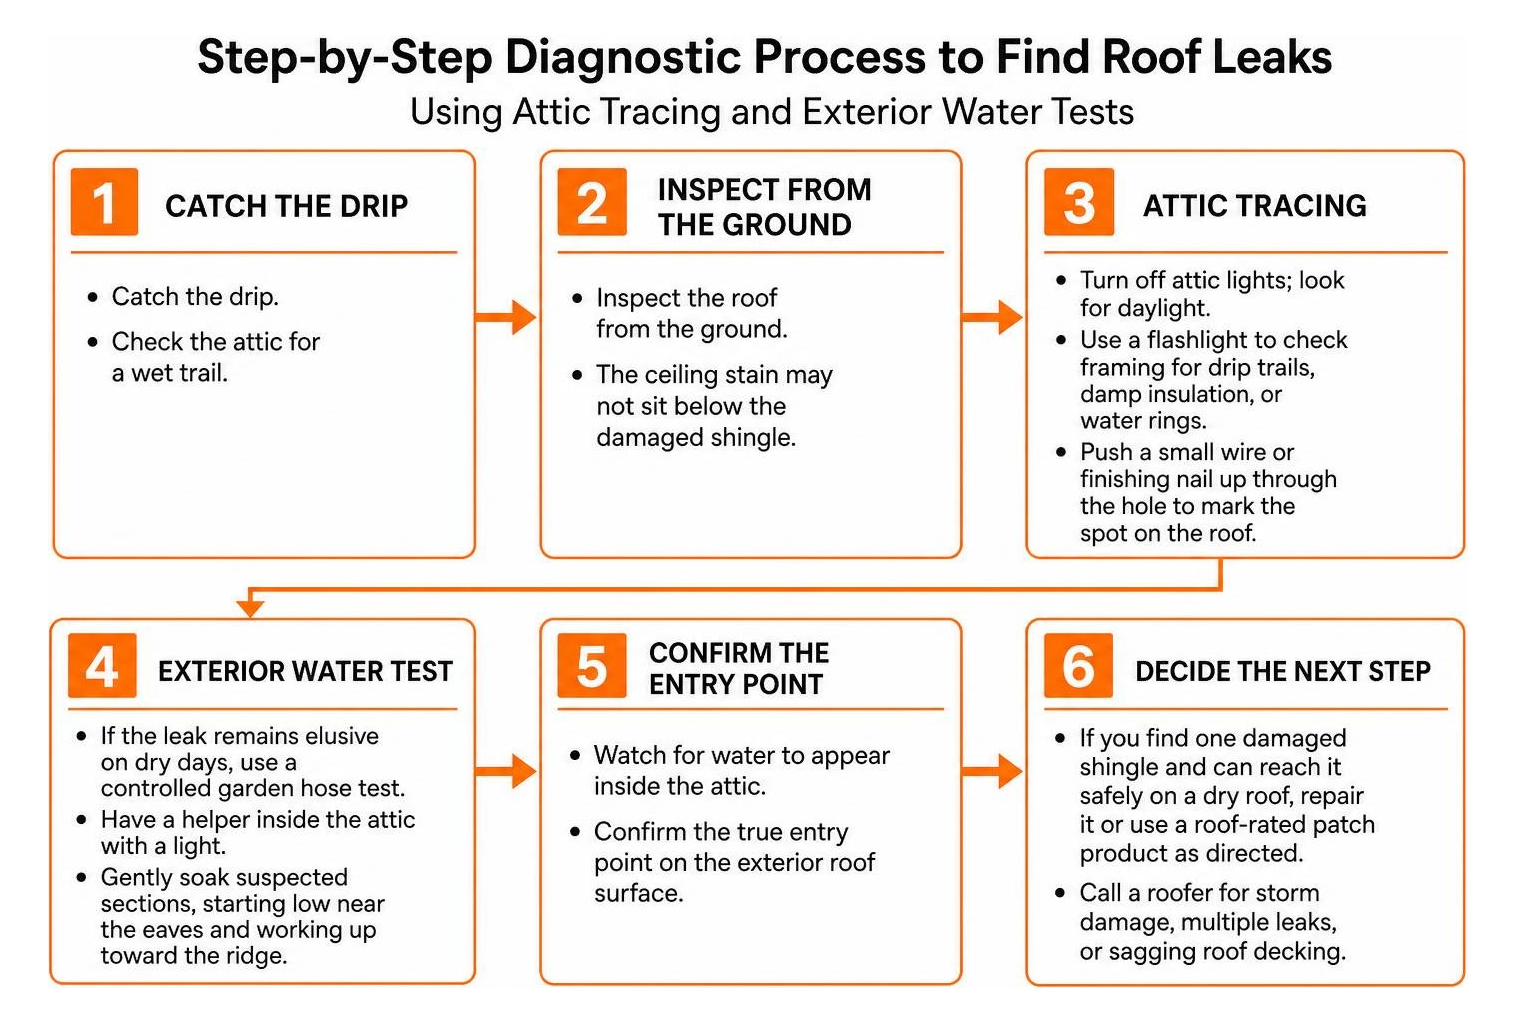
If the leak remains elusive on dry days, use a controlled garden hose test. Have a helper sit inside the attic with a light while you gently soak suspected sections of the roof, starting low near the eaves and slowly working up toward the ridge. For detailed diagnostic techniques to protect your interior living space, check out these smart ways to diagnose and fix a leaky ceiling.
Deciding Between DIY Roofing Leaking Repair and Professional Help
Not every roof leak is suitable for an afternoon do-it-yourself project. Before climbing up, evaluate your roof’s pitch, your comfort with ladder safety, and the true extent of the damage.
| Repair Scenario | DIY Candidate? | Recommended Approach |
|---|---|---|
| Single cracked or torn shingle | Yes | Spot seal or replace tab using hand trowel |
| Small puncture from a nail or dish mount | Yes | Apply three-course patch with mesh |
| Cracked neoprene vent pipe collar | Yes / Moderate | Slip on a repair collar or seal base |
| Rusted, deteriorated valley flashing | No | Call a professional roofer |
| Multiple leak points across several slopes | No | Schedule a comprehensive inspection |
| Sagging roof deck or rotted rafters | No | Call for structural assessment |
| Steep slope (over 6/12 pitch) or high wind | No | Contact emergency roof repair |
Always prioritize personal safety. Use a sturdy extension ladder extended three feet above the roofline, secure the base, wear slip-resistant rubber-soled shoes, and never walk on wet shingles. If a project feels beyond your physical comfort or involves complex transitions, calling a qualified professional is the smartest move.
Applying the Three-Course Roofing Leaking Repair Method
For tears, splits, or small holes in asphalt shingles, a simple smear of roof cement on top will soon crack due to thermal expansion. The professional way to fix small penetrations is the three-course patch method, which embeds reinforcing fabric between two layers of sealant.
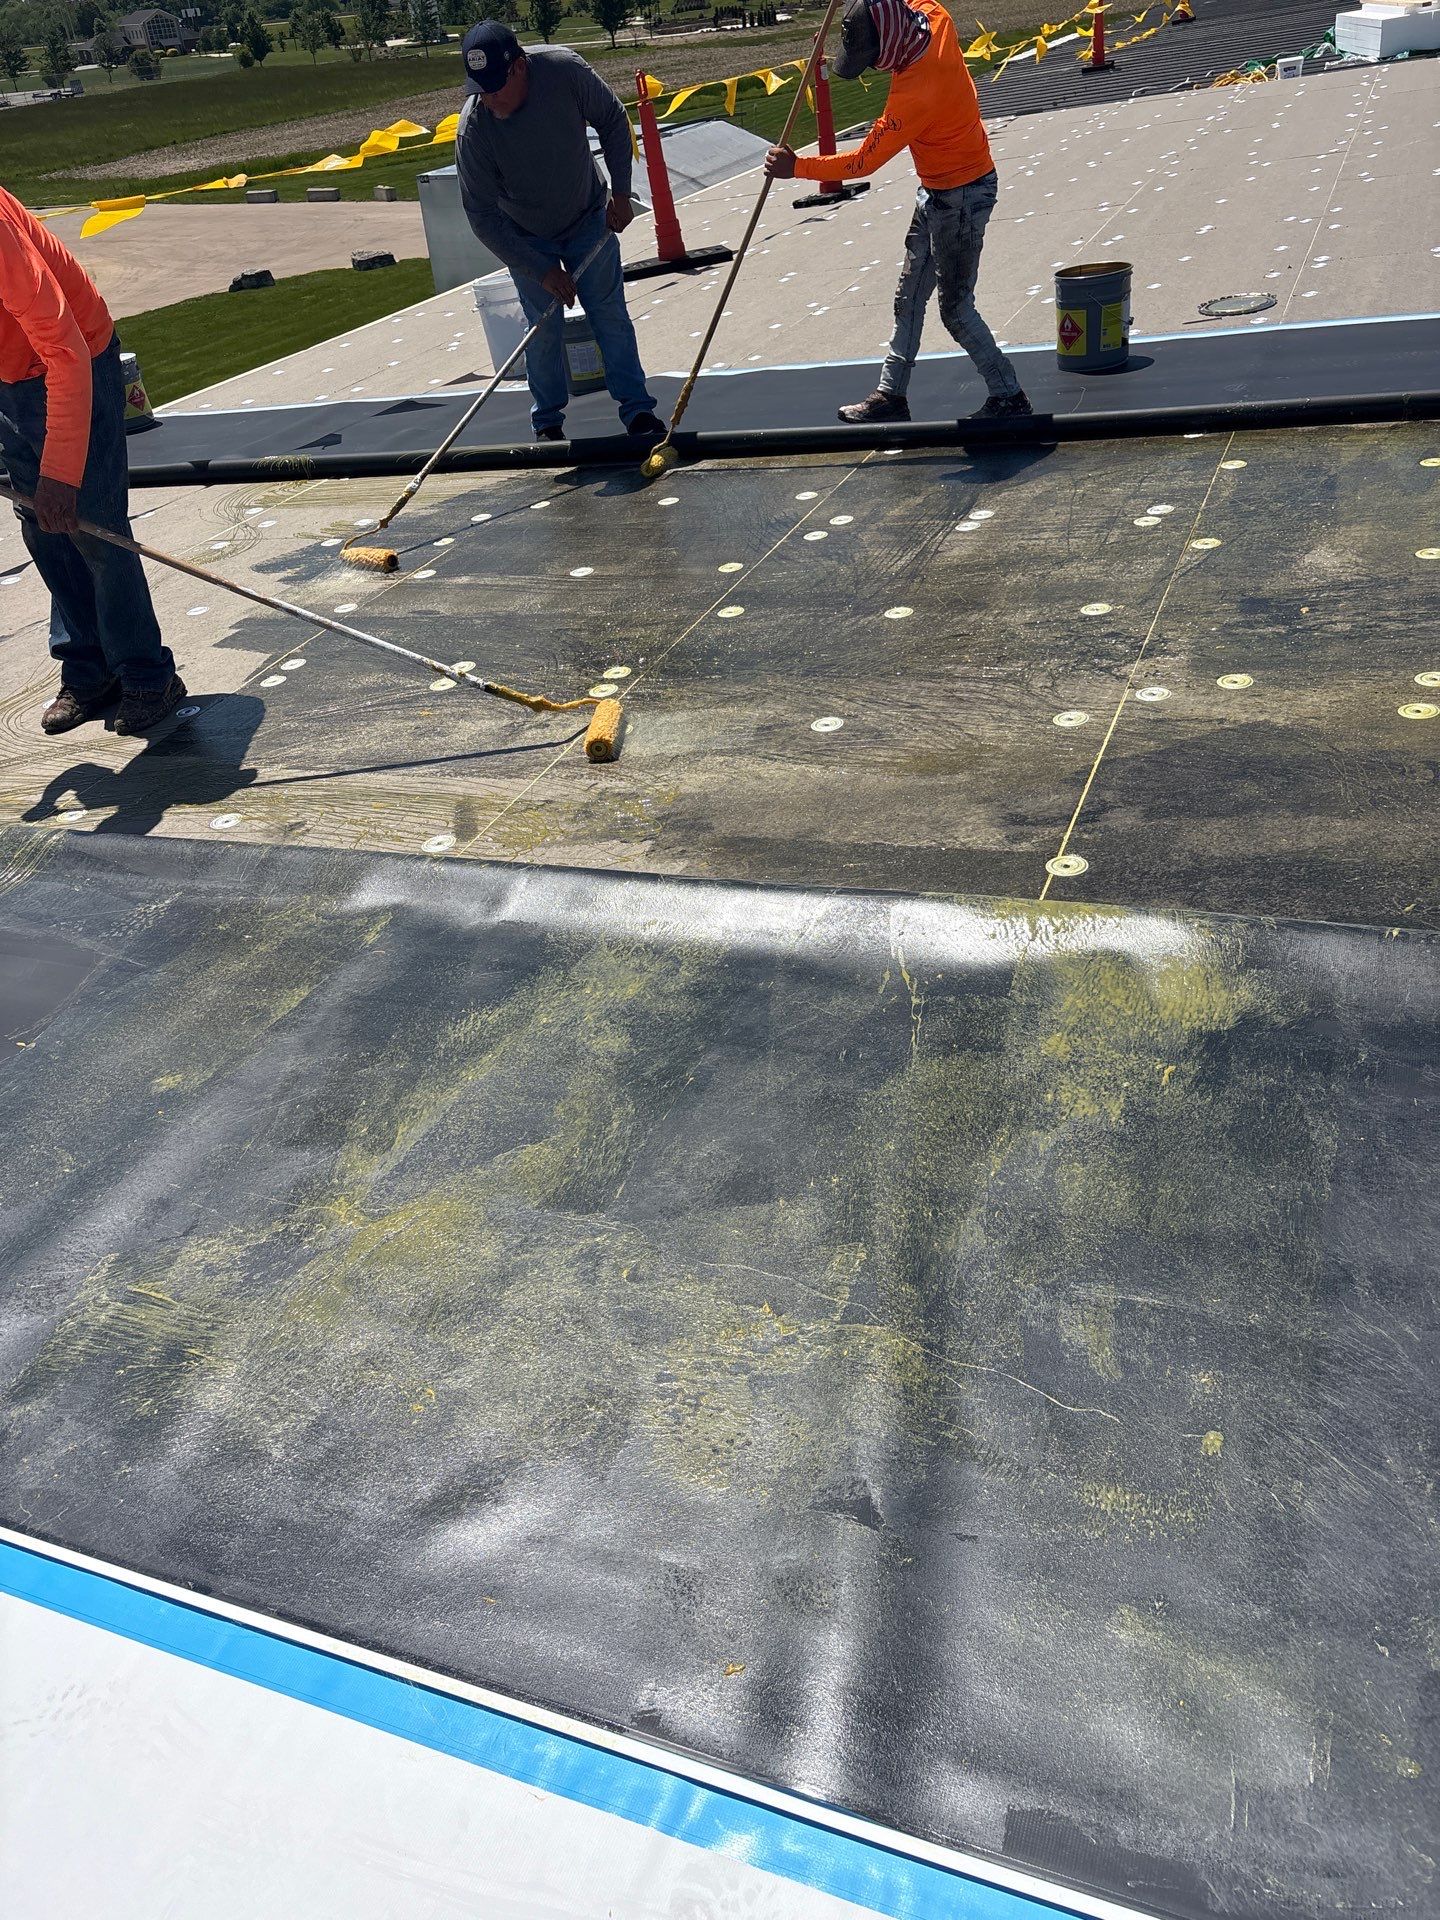
- Clean the Surface: Scrape away loose debris, dirt, and moss from around the split. If repairing a metal edge, remove surface rust with a wire brush.
- Apply the First Layer: Using a trowel or putty knife, spread a smooth layer of rubberized wet patch (such as Henry 208R) roughly 1/8-inch thick over the damaged area, extending 2 to 3 inches beyond the edges of the split.
- Embed Reinforcing Fabric: Press a cut piece of fiberglass mesh or roofing repair fabric firmly into the wet compound. This fabric provides tensile strength so seasonal expansion won’t pull the patch apart.
- Apply the Top Layer: Trowel a second 1/8-inch layer of patch compound completely over the fabric, feathering the edges smooth so water glides over without catching.
High-grade products meeting ASTM D3409 standards are engineered to stick even to damp or wet surfaces, which is invaluable when fixing a leak in your roof after a storm. While these asphalt-based compounds work well on asphalt shingles, rolled roofing, and modified bitumen, they are not formulated for single-ply rubber (EPDM) roofs.
Repairing Flashing, Roof Valleys, and Cracked Vent Boots
Roofs depend on metal and rubber transitions to channel bulk water away from vulnerable joints. When a leak occurs, these transitional areas are often the primary culprits.
- Vent Pipe Boots: Plumbing vent pipes penetrate the roof, sealed by a rubber or neoprene collar. Over years of sun exposure, the rubber dries out and splits. You can temporarily bridge cracks with sealant, but the permanent fix is sliding a new rubber collar over the pipe or replacing the boot entirely.
- Step and Counter Flashing: Flashing channels water around vertical walls and chimneys. Inspect these areas for cracked caulking along the mortar lines or bent metal. Learn more about finding and sealing hidden flashing leaks around chimneys before lifting edge shingles.
- Roof Valleys: Valleys carry massive volumes of rushing rainwater during downpours. Never drive nails directly into the center of a valley or attempt thick surface patches here, as water will dam up and find its way under adjoining shingles. Consult Lowe’s guide on How to Repair a Leaky Roof to understand how interlocking valley components manage heavy drainage.
Assessing Long-Term Moisture Damage and Next Steps
Once the exterior patch is applied, you must address what happened inside your attic. Water damage does not stop just because the rain cleared up outside.
Trapped moisture can quickly compromise building materials:
- Mold Formation: Active mold colonies can establish on damp drywall, paper sheathing, and insulation in as little as 24 to 48 hours in warm, unventilated attics.
- Structural Degradation: Wood framing and plywood decking lose structural integrity and begin rotting when sustained moisture levels exceed roughly 19%.
- Escalating Repair Costs: A minor leak that costs $300 to $600 to repair promptly can escalate into $3,000 to $8,000 in structural rot repair and mold remediation if water sits trapped through a single humid season.
After sealing the roof, remove soaked insulation, run fans or dehumidifiers in the attic space, and monitor the wood with a moisture meter to ensure framing dries completely. For severe moisture issues or recurring dampness, consider scheduling professional residential roof repair services to evaluate your roof deck.
Evaluating Storm Damage, Insurance Claims, and Structural Rot
Severe weather frequently causes widespread damage that simple afternoon patches cannot address. Hail strikes bruise the internal asphalt mat, dislodging protective mineral granules and exposing shingles to rapid UV deterioration. High winds can break the adhesive sealant strips underneath entire rows of shingles, allowing wind-driven rain to blow beneath the tabs.
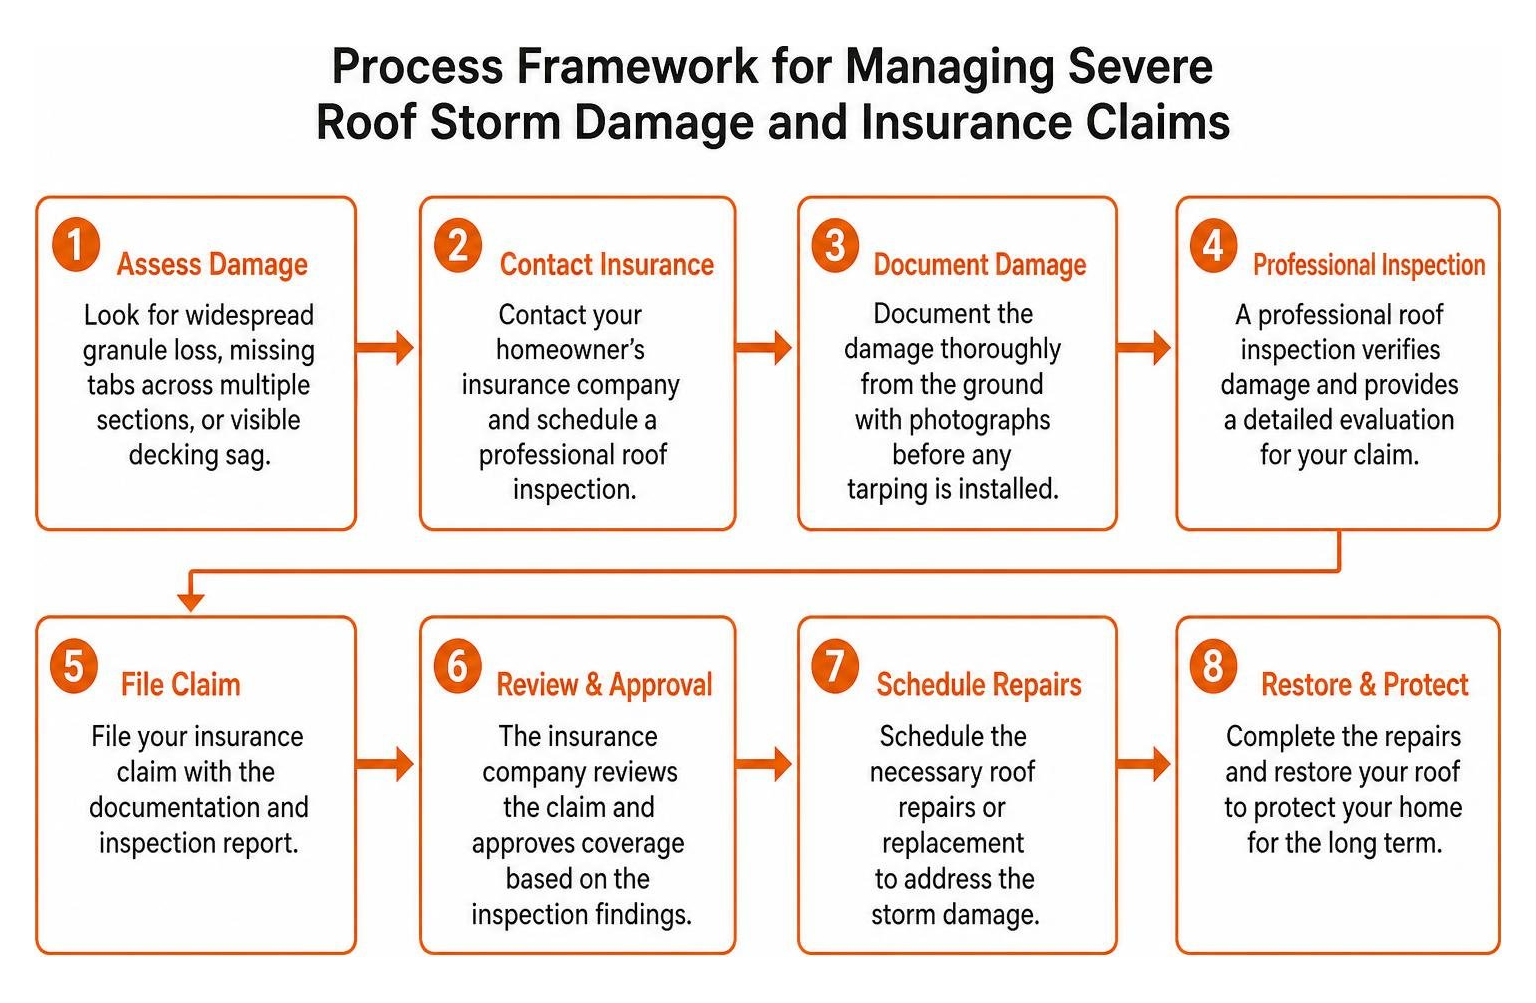
If your roof exhibits widespread granule loss, missing tabs across multiple sections, or visible decking sag, contact your homeowner’s insurance company and schedule a professional roof inspection. Document the damage thoroughly from the ground with photographs before any temporary tarping is installed.
At Mid-State Construction & Roofing, Inc., we provide dependable commercial and residential roofing services throughout Central Illinois, including Effingham, Beecher City, Shelbyville, Altamont, Vandalia, Ramsey, Salem, Hillsboro, and Litchfield. Our team uses top-tier materials and rigorous project supervision to ensure long-lasting results. Whether you need a simple flashing repair or a complete replacement after severe weather, visit our team for comprehensive roofing solutions that protect your home for decades to come.