Can You Install Cedar Shingles Yourself Without Ruining Your Roof?
Understanding Cedar Shingles vs. Shakes Before You Begin
Yes, you can install cedar shingles yourself without ruining your roof, but only if you get the critical details right: a breathable ventilation matrix under the shingles, corrosion-resistant stainless steel fasteners, correct keyway spacing, and the proper weather exposure for your roof slope. A DIY cedar shingle installation is feasible for a careful homeowner, but it leaves little margin for error. Before climbing a ladder or pulling a single bundle from the pallet, you need to know exactly what material you are working with. While both come from Western Red Cedar or Alaskan Yellow Cedar, shingles and shakes are distinctly different architectural products. If you are currently comparing different types of shingles, mixing up these two will throw off your calculations for fastener lengths, exposures, and weather barriers.
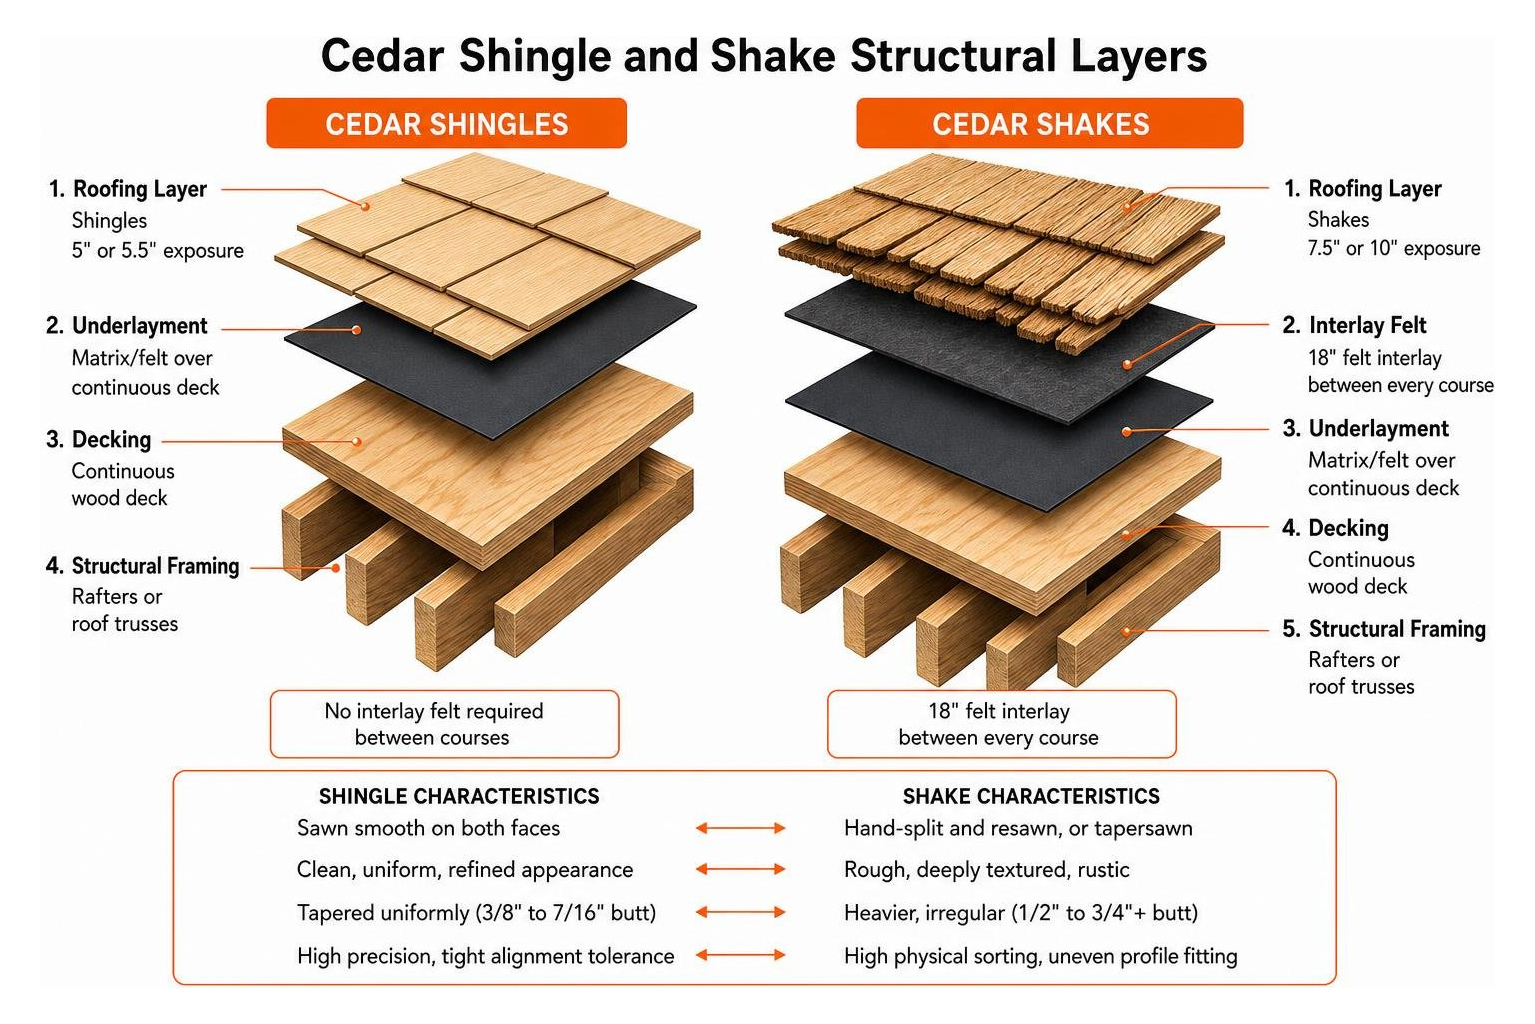
| Feature | Cedar Shingles | Cedar Shakes |
|---|---|---|
| Manufacturing | Sawn smooth on both faces | Hand-split and resawn, or tapersawn |
| Surface Texture | Clean, uniform, refined appearance | Rough, deeply textured, rustic |
| Thickness | Tapered uniformly (typically 3/8″ to 7/16″ butt) | Heavier, irregular (1/2″ to 3/4″+ butt) |
| Weather Exposure | Typically 5″ (16″ length) or 5.5″ (18″ length) | Typically 7.5″ (18″ length) or 10″ (24″ length) |
| Underlayment Needs | Continuous deck + matrix/felt; no interlay felt | 18″ felt interlay between every course |
| Labor Demand | High precision, tight alignment tolerance | High physical sorting, uneven profile fitting |
Sawn Shingles vs. Split Shakes
Sawn shingles feature smooth, clean-cut profiles on both sides. Because mills saw them directly from the cedar block, they lay flatter against the decking, producing sharp, clean shadow lines. This geometric uniformity makes them great for historic restorations, Victorian profiles, and Cape Cod sidewalls.
Handsplit shakes, on the other hand, are cleaved along the natural grain line of the wood and often resawn on one face. This process creates a thick, heavily textured surface with varied grain patterns. While shakes give an undeniable rustic presence, their irregular thickness creates pathways that can trap water if not detailed correctly. While evaluating asphalt shingles vs metal roofing offers a look at modern industrial options, choosing cedar means committing to natural wood movement and traditional craft.
Wood Grades, Moisture Content, and Acclimation
Cedar is prized for its naturally occurring thujaplicins—organic preservatives that resist fungal decay and insect attacks. However, not all wood bundles deliver equal performance.
When buying materials, look for the industry standard: Certi-label® certification by the Cedar Shake & Shingle Bureau.
- Number 1 Grade (Blue Label): The gold standard for roofing. These are 100% heartwood, 100% clear (zero knots), and 100% edge grain (vertical grain). Edge grain expands evenly across its width, minimizing warping.
- Number 2 Grade (Red Label): Contains flat grain and some knots in the upper portion. Suitable for secondary outbuildings or undercoursing on sidewalls, but risky for primary residential roofs.
- Number 3 Grade (Black Label): Utility grade intended strictly for farm structures or decorative accents.
Before driving a single fastener, consider moisture equilibrium. Fresh-cut green cedar can have a moisture content between 25% and 35%, while kiln-dried or factory-primed bundles sit around 10% to 14%. As cedar dries, it shrinks; as it absorbs rain, it expands.
If you store bundles sealed in shrink-wrap on a damp lawn, they will cup immediately after installation. Always stack bundles flat, off the ground on pallets, protected with a breathable tarp to let them acclimate to your local environment for several days. Knowing these nuances is part of learning how to choose the best roofing material for your home.
Essential Tools, Fasteners, and Deck Preparation for Cedar Shingle Installation
A successful install depends heavily on preparation. You cannot treat cedar like fiberglass shingles. Wood moves, breathes, and reacts chemically with various metals. To guarantee code compliance and prevent warranty issues, reference the CSSB Roof Installation Manual before ordering your hardware.
Fastener Selection: Nails vs. Staples and Penetration Depths
Using standard electro-galvanized framing nails on cedar will quickly cause problems. Cedar’s natural tannic acid chemically reacts with cheap zinc plating, creating black, weeping rust streaks across your roof before the nail corrodes entirely.
You must use corrosion-resistant fasteners:
- Type 304 or Type 316 Stainless Steel: Required in harsh climates or within 15 miles of salt water; highly recommended everywhere for maximum longevity.
- Hot-Dip Galvanized (ASTM A153): Acceptable for inland applications when sourced from certified manufacturers.
- Shank Style: Ring-shank or deformed-shank nails provide vastly superior pull-out resistance compared to smooth-shank options, especially under seasonal thermal expansion.
- Fastener Penetration: Nails must penetrate at least 3/4 inch into the roof deck sheathing, or completely through the underside of plywood or OSB by at least 1/8 inch.
- Staples vs. Nails: While wide-crown stainless steel staples (7/16″ crown) are widely accepted by code for sidewall applications because they bridge the grain nicely, ring-shank nails remain the preferred standard on roof slopes.
Roof Deck Prep, Breathable Underlayment, and Rain Screen Ventilation
Cedar needs air circulation on both sides to dry evenly after rainfall. If you nail shingles down directly onto a non-permeable synthetic vapor barrier, the underside stays wet, while the sun bakes the top face. This severe moisture imbalance leads directly to cupping, curling, and rot.
- Deck Sheathing: A solid deck of minimum 1/2-inch CDX exterior-grade plywood or 7/16-inch OSB is standard. In historic renovations, 1×4 or 1×6 spaced sheathing (skip sheathing) is often used, providing natural air movement directly beneath the wood.
- Underlayment: Cover the solid plywood deck with a layer of No. 30 asphalt-saturated organic felt conforming to ASTM D226 Type II or ASTM D4869 Type IV. Avoid standard non-breathable plastic wraps that trap condensation.
- Ventilation Matrix (Rain Screen): On solid decks, install a three-dimensional nylon mesh drainage matrix (such as Cedar Breather®) directly over the felt. This creates a continuous 1/4-inch air cavity, letting condensation drain away while allowing airflow under the entire roof deck. This attention to detail reflects what to expect when getting a new roof installed by experienced pros.
Step-by-Step Cedar Shingle Application Process
Applying wood shingles requires patience and a strict layout routine. Follow the guidelines outlined in the Western Red Cedar Shingles Application Handbook to ensure the roof performs reliably year after year.
Starter Course and Exposure Rules in Cedar Shingle Installation
The base of the roof handles the greatest volume of shedding water and faces high wind-uplift pressures.
- Double or Triple Starter: Never lay a single course at the eaves. You must install a double starter course—an undercourse laid down first, covered immediately by a surface starter course. In high-exposure settings, a triple starter course offers extra protection.
- Drip Edge Overhang: Project the butt of the starter course 1-1/2 inches past the fascia board and 1 inch beyond the gable or rake edges. This direct shed prevents water from wicking back into your trim boards.
- Calculating Exposure: The weather exposure (the exposed length of the shingle butt) is dictated by the roof slope and the shingle length. For standard 16-inch Number 1 Grade shingles:
- Roof slopes 4:12 and steeper: Maximum exposure is 5 inches.
- Roof slopes between 3:12 and 4:12: Maximum exposure drops to 3-3/4 inches (increasing the layer thickness).
- Note: Never install cedar shingles on slopes under 3:12 without specialized membrane systems.
Keyway Spacing and Joint Offsets in Cedar Shingle Installation
Getting the spacing right is where many DIY jobs fall short. Wood expands across its width when soaked with rain, so tight edge-to-edge installation will cause individual shingles to buckle and split.
- Maintain Keyway Spacing: Leave a consistent gap between adjacent shingles. For kiln-dried Number 1 Grade shingles, maintain a 1/8-inch to 1/4-inch keyway gap. For green or wet wood, drop the gap slightly to 1/16 to 1/8 inch, as the wood will shrink once it reaches equilibrium.
- Offset Side Joints (The 1.5-Inch Rule): Never align the side joint of an upper course directly over a joint below it. You must stagger all side joints by a minimum of 1-1/2 inches across adjacent courses.
- Track Three Consecutive Courses: Check your vertical seams across three continuous rows. No two joints should line up within three courses of each other. If water finds a path straight down through aligned joints, it can bypass the triple-lap protection and hit the deck.
Tricky Details: Flashing, Valleys, Sidewalls, and Weaving Corners
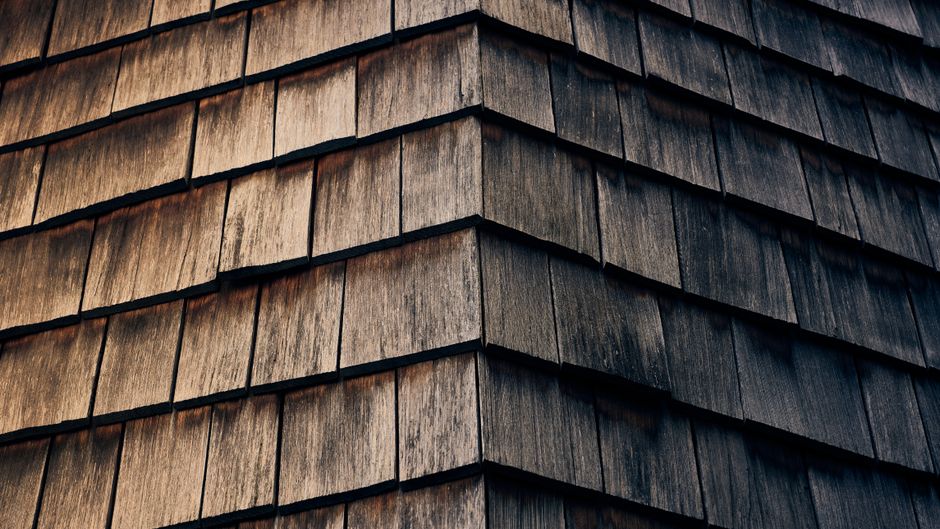
Roof junctions are the true test of any installation. A straight run of decking is simple enough, but intersections require careful planning and sheet metal craftsmanship. Review the CSSB Exterior Wall Manual for code requirements regarding vertical abutments.
Penetration Flashing and Valley Waterproofing
Valleys channel large volumes of rushing water during heavy storms. While closed valleys look tidy on architectural shingles, cedar roofing performs best with an open valley design.
- Open Metal Valleys: Center an 18-gauge to 26-gauge corrosion-resistant metal valley liner (copper, stainless steel, or painted aluminum) over a 36-inch wide peel-and-stick ice-and-water shield. The valley should leave an open channel at least 4 to 6 inches wide at the top, tapering wider toward the bottom by 1/8 inch per foot to shed leaves and snow easily.
- Shingle Trimming: Cut the valley shingles neatly on an angle to match the valley centerline. Never drive a nail within 2 inches of the center of the valley metal.
- Penetrations: Around plumbing vents, install a heavy-duty neoprene or copper flashing boot. Around masonry chimneys, integrate a proper cricket (saddle) on the high side, with woven step flashing along the sides, overlapping each sheet metal step by at least 2 inches with every rising shingle course.
Weaving Inside and Outside Corners for Sidewall Applications
When shingling vertical exterior walls, you can either install wood corner trim boards or build a classic woven corner. Woven corners provide a clean, historic look that holds up well against driving rain.
- Lacing Outside Corners: Bring courses on both adjoining walls up simultaneously. On the first course, lay the shingle on Wall A so it extends just past the corner, then trim and plane it flush to Wall B using a hand block plane. On the very next course, reverse the pattern: let Wall B overlap Wall A, and plane it flush. Alternate this weave with every row.
- Inside Corners: Install a continuous strip of 26-gauge metal flashing bent at 90 degrees behind the shingles, extending at least 4 inches each way. While you can weave inside corners, it is often simpler and cleaner to butt the shingles neatly against a square 1-1/2″ x 1-1/2″ corner guide strip.
Critical Mistakes That Cause Premature Cedar Roof Failure
Cedar shingles can easily last 30 to 50 years when properly installed, yet minor mistakes can ruin a roof in under five. Understanding these points of failure will save you time, materials, and money.
Over-Driving Fasteners and Missing Nailing Lines
Fastener placement errors are the number one cause of premature cedar roof failure:
- The 1-Inch Reveal Rule: Drive nails exactly 1 inch above the exposure line (butt line of the next course) and 3/4 inch inward from each outer edge. Fasteners placed too high allow shingles to flutter and lift in the wind; fasteners placed too low remain exposed to direct rain.
- Over-Driving Depth: Drive the nail head completely flush with the surface of the wood. Using an unregulated pneumatic coil nailer can easily punch the nail head right through the outer grain, crushing the wood fibers. Once the surface fibers are crushed, water pools in the pocket, rotting the shingle core until the wind shears it off the deck.
- Two Fasteners Only: Use exactly two nails per shingle up to 10 inches wide. Only use four nails on wide boards over 10 inches. Adding extra nails into the center of the shingle restricts natural movement, splitting the board down the middle during dry weather.
Inadequate Ventilation and Using Incompatible Sealants
- Trapping Moisture Underneath: Skipping the nylon matrix or breathable underlayment traps ambient condensation against the back of the cedar. The wood will cup, curl, and rot from the bottom out.
- Applying Film-Forming Sealants: Never paint, coat, or slather silicone sealers over new cedar shingles. Cedar needs to breathe. Clear water-repellent preservatives containing zinc or copper compounds work well, but film-forming deck stains or roofing tar trap moisture inside the grain, accelerating rot. Keeping an eye on these details is covered in our essential roof maintenance tips.
Frequently Asked Questions About Cedar Shingle Installation
What is the correct keyway spacing between cedar shingles?
Maintain a keyway gap of 1/8 inch to 1/4 inch between adjacent shingles on roofs. For kiln-dried materials, stick closer to the 1/4-inch side of the spectrum to account for rain expansion. For green cedar with high moisture content, a 1/16-inch to 1/8-inch gap is standard.
Can you use a pneumatic nail gun for cedar shingle installation?
Yes, but you must use a specialized coil roofing nailer equipped with a working depth-of-drive adjustment and flush-drive nosepiece. Always test your air compressor pressure on scrap wood first to verify that nail heads sit flush with the cedar face without tearing the wood grain. If your equipment cannot consistently hold depth, switch to hand nailing.
How long does a properly installed cedar shingle roof last?
A Number 1 Grade Western Red Cedar roof installed over a breathable ventilation matrix with stainless steel fasteners will reliably last 30 to 40 years. In favorable climates with regular maintenance and preservative treatments, high-grade cedar installations can reach 50 years of service life.
Conclusion
Installing a cedar roof is a rewarding, heritage craft, but it leaves very little margin for error. A single misaligned valley, over-driven nail, or missing ventilation layer can lead to costly water damage and shorten the lifespan of your roof.
If you are weighing the physical demands, specialized tools, and precise layout requirements of a DIY install, working with a seasoned professional is often the most practical choice. Knowing how to choose a roofing company with proven experience in traditional wood systems will save you headaches down the road.
At Mid-State Construction & Roofing, Inc., we provide high-grade residential and commercial roofing solutions backed by strict project supervision and quality assurance. Whether you need an honest roof inspection, historic restoration advice, or a complete replacement, reach out to our team today to get your project done right.