
Planning Your Skylight Project from Rafters to Roof Flashing
How to Plan a Skylight Installation That Keeps Water Out
To install a skylight, check the roof pitch and look for rafters, wiring, and ducts before cutting. Use the skylight’s specified rough-opening size, frame the opening to local code, secure the curb to solid roof framing, and fit flashing made for your roof type. Keep the roof watertight throughout the job. If the work changes structural framing or adds electrical wiring, bring in qualified professionals.
A skylight can add welcome daylight, but its long-term success depends on the parts you cannot see from the room: sound framing and properly layered flashing.
I’m Virgil Strauch, a self-employed president with experience in planning and operational oversight. I bring that planning-first approach to explaining skylight installation, starting with the checks that matter before the first cut.
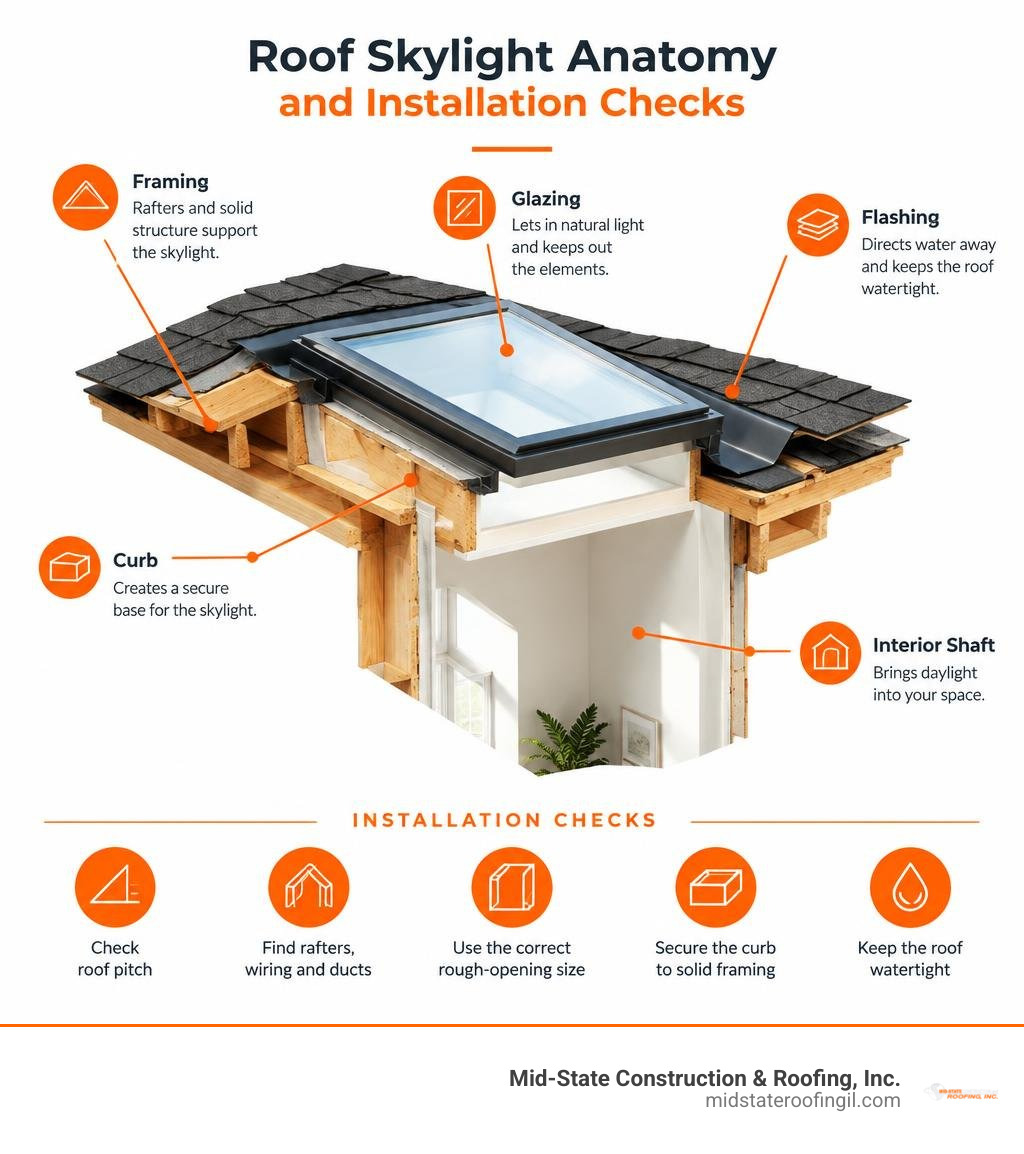
Essential skylight installation terms:
Complete Guide to Skylight Installation: Structural Framing and Flashing
A flawless roof penetration demands structural precision and rigorous moisture management. Cutting into a roof deck alters the distribution of weight across your rafters or trusses. Before altering any building components, identify potential issues by watching for residential roofing hidden problems such as rotted sheathing, sagging framing members, or historic water infiltration.

Proper planning ensures that load paths remain intact and every layer of underlayment, curb framing, and metal flashing sheds water down the slope of the roof without relying entirely on surface sealants.
Framing, Cutting, and Curb Attachment Requirements
The rough opening must align precisely with the manufacturer’s carton specifications. Never assume framing dimensions match external skylight measurements.
- Locate Joists and Check for Obstructions: Use a stud finder to map ceiling joists. Drill a small pilot hole centered between the framing members and insert a stiff wire bent at a 90-degree angle. Rotate the wire 360 degrees to detect hidden electrical conduits, plumbing pipes, or HVAC ductwork before cutting drywall.
- Transfer Reference Marks to the Roof Deck: Drive long reference screws or drill pilot holes upward through the roof deck at the corner locations of your planned opening.
- Cut and Frame the Opening: Cut away shingles and roof sheathing along your layout lines. Frame the rough opening using lumber of the same structural grade and dimension as your roof rafters. Install double headers at the top and bottom of the opening, verifying header sizing against local building codes.
- Secure the Curb to Maintain Warranty Protection: Place your prefabricated or site-built curb over the rough opening. Level, plumb, and shim the curb as required. Secure it using 8-d common nails or 2½-inch structural wood screws. Fasteners must penetrate at least 1½ inches into solid framing lumber. Space fasteners 12 inches on center around the perimeter and within 4 inches of every corner. Skipping these fasteners or failing to reach solid wood can compromise structural integrity and void the manufacturer’s leak-free warranty.
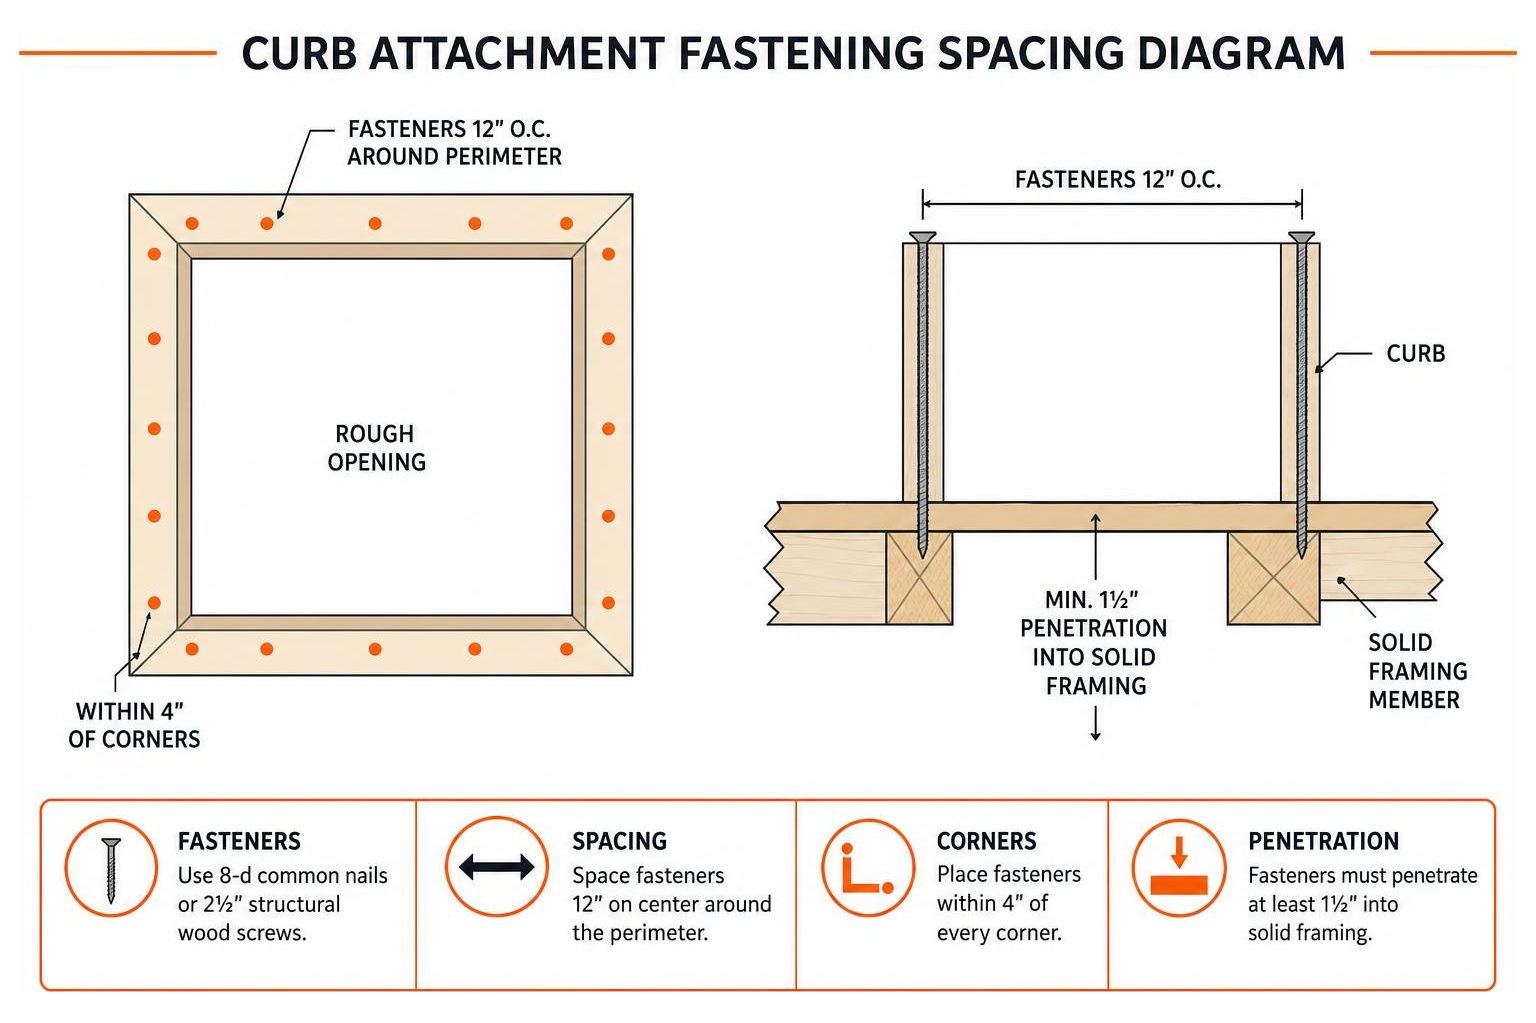
Consult the manufacturer’s Installation Instructions for exact fastener patterns and model-specific framing tolerances.
Continuous vs. Step Flashing for Pitched, Metal, Tile, and Flat Roofs
Flashing details must match your roof covering and pitch. The selection of underlayment and metal profiles determines long-term weather performance. Knowing how to choose the best roofing material for your home provides essential context when integrating skylight systems into asphalt, metal, or tile surfaces.
| Flashing Attribute | Continuous Perimeter Flashing | Step Flashing System |
|---|---|---|
| Ideal Roof Type | Metal, low-pitch, specialized curb units | Standard asphalt shingle, cedar shake, slate |
| Minimum Pitch | Minimum 3:12 (custom curbs for lower pitches) | Minimum 3:12 pitch |
| Top Removal | Skylight top stays intact during install | Often requires sash/top removal for hinge access |
| Water Shedding | Single continuous pan/apron redirects runoff | Interwoven L-shaped pieces shed water per shingle course |
| Fastener Rule | Never nail through the exposed apron flange | Nail only the upper corner of individual step pieces |
- Pitched Asphalt Roofs: Require ice-and-water shield wrapped up the curb sides by a minimum of 3 inches. Step flashing pieces are interwoven with every shingle course, maintaining a ½-inch clearance gap between the shingle edges and the curb to allow drainage.
- Tile Roofs: Install bottom flashing under the lower skylight lip first. Side flashings overlap the bottom pan, bottom tabs fold over side components, and head flashing interlocks over the top. Bed flashing edges in high-grade roofing silicone.
- Metal Roof Profiles: Require custom perimeter flashing fabricated with at least a 70 mm upstand to prevent wind-driven rain penetration under standing seams or corrugated ribs.
- Flat Roofs: Low-slope roofs below a 3:12 pitch require elevated curbs (typically 4 to 8 inches above the finished roof surface) waterproofed with compatible membrane base flashing and elastomeric sealants. Review K Series 10″, 13″ and 18″ Tubular Skylight Flat Roof Installation Instructions when detailing low-slope installations.
Tubular Skylight Installation vs. Standard Curb-Mounted Skylights
Tubular daylighting devices capture sunlight through an exterior dome and route it through a highly reflective pipe into interior rooms. A tubular skylight installation typically takes between 1 to 3 hours to complete, making it an efficient way to illuminate hallways, bathrooms, or closets without altering major roof trusses.

When planning tubular systems, review the following manufacturer guides:
- Installation Instructions for locking light pipe mechanisms.
- K Series 10″, 13″ and 18″ Tubular Skylight Curb Mount Installation Instructions for curb mounting steps.
- Rigid and Flex Tubular Skylights for flexible tubing runs around structural obstacles.
Critical Tubular Skylight Installation Precautions
- Maximize Sun Capture: Position the roof dome with an unshaded southern exposure to achieve maximum daily light output.
- Orient the Reflective Seam: Align the internal reflective tube’s vertical mechanical seam toward the East or West. This prevents irregular light banding across the living space below.
- Prevent Fire Hazards: The interior surface of reflective tubing concentrates light intensely. Never leave an open, uncovered reflective pipe exposed to direct sun before mounting the ceiling diffuser.
- Handle Edges Safely: Cut light pipe material is razor-sharp. Wear cut-resistant gloves and safety goggles when trimming extension sections.
- Seal All Joints: Wrap every pipe connection and slip joint with heavy-duty aluminum foil tape to block moisture, attic dust, and insect entry.
Electrical Integration, Troubleshooting, and Warranty Care
Modern skylights often include motorized venting drives, solar recharging systems, integrated blinds, and environmental sensors. Protecting these units requires correct low-voltage electrical work, sensor calibration, and consistent maintenance. Read about the importance of regular roof maintenance to protect motorized glass units and roofing flashing against premature wear.
Motorized and Solar-Powered Skylight Installation Wiring and Setup
Motorized skylights provide controlled ventilation without requiring manual crank handles. Safe operation relies on proper voltage management and correct pairing procedures outlined in the SKYLIGHT INSTALLATION & ELECTRICAL GUIDE .
- Voltage Protection: Electric skylight motors operate on low-voltage 24V DC systems. Connecting a 24V drive directly to 110V–240V mains power will instantly destroy the internal circuitry. Always run power through the specified step-down transformer and install a dedicated wall isolator switch.
- Solar Modules: Solar-powered units use self-contained photovoltaic cells and internal battery packs. Ensure the solar panel receives direct light and clean it periodically to keep the charging system and built-in sensors operating smoothly.
- Remote and Blind Programming:
- Press and hold the programming key on the solar module or operator control box for 5 seconds until the LED flashes.
- Within 15 seconds, select your assigned channel on the remote transmitter.
- Press the “Up” button; the module will flash or beep to confirm pairing.
- Program electric blinds to a separate remote channel from the window sash motor to allow independent operation.
Troubleshooting Motors, Electric Blinds, and Rain Sensors
If smart features or automated controls malfunction, work through these diagnostic checks:
- Motor Vibration or Stalling: Check that the sash is sitting square in its frame. An out-of-square curb places mechanical tension on drive chains. Loosen curb fasteners slightly, re-square the frame, and retighten.
- Remote Desynchronization: Reset the remote by holding the channel selector and programming pin simultaneously for 10 seconds. Re-pair the device to the primary control module.
- Rain Sensor Failures: Test automatic closure functions by spraying a fine water mist over the exterior sensor pad. If the sash fails to close, clean dirt, sap, or pollen buildup off the sensor surface using a damp microfiber cloth.
- Condensation and Moisture Drops: Condensation inside the light shaft does not necessarily indicate a roofing leak. Ensure internal drywall cladding maintains a minimum 5 mm thermal break gap from the skylight frame. Avoid placing fabric electric blinds inside high-humidity environments like unvented bathrooms or laundries.
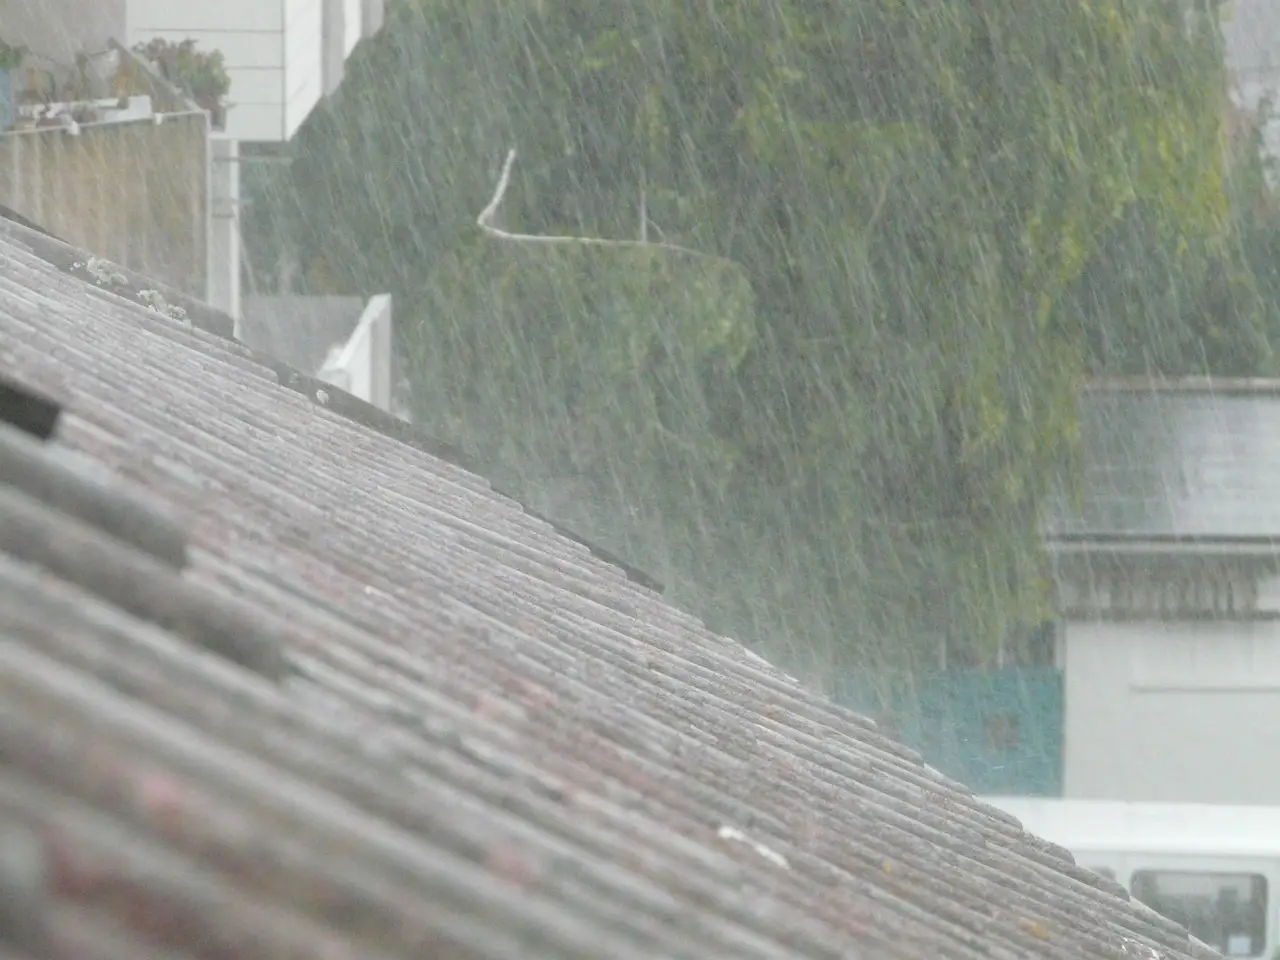
If you observe continuous water running down the framing rafters during steady rain, you may need immediate service. Review the common signs that you need an emergency roof repair to determine whether water intrusion is entering through the roof deck or the unit itself.
Jobsite Safety, Warranty Compliance, and Maintenance Best Practices
Roof work carries inherent physical risks. Always wear slip-resistant footwear, secure your ladder on firm ground, and use OSHA-compliant personal fall arrest harnesses. Avoid working on damp, icy, or brittle roof shingles.
Standard Warranty Coverage Profiles
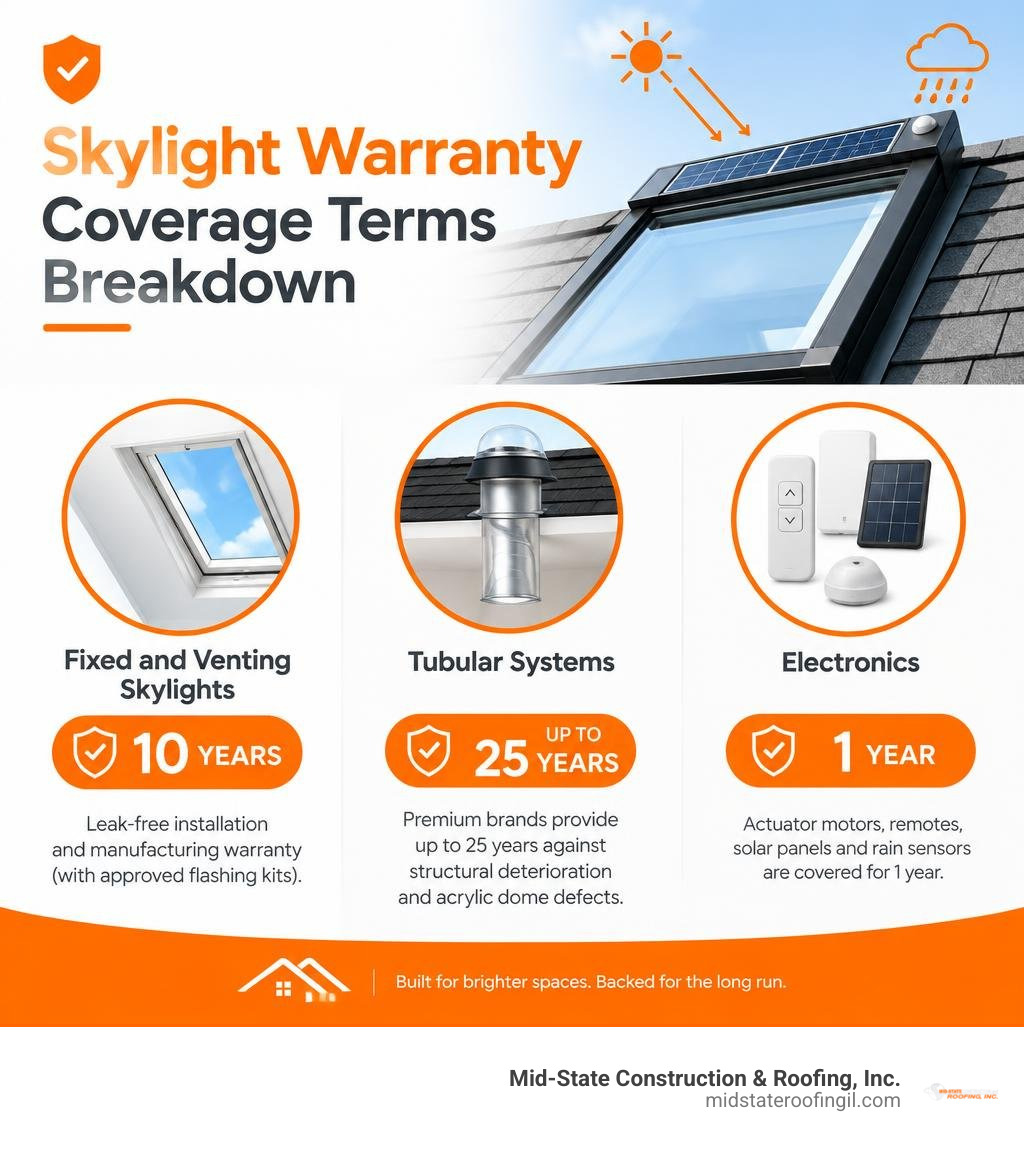
- Fixed and Venting Skylights: Typically protected by a 10-year leak-free installation and manufacturing warranty when installed with manufacturer-approved flashing kits.
- Tubular Systems: Premium brands (such as CrystaLite) provide up to a 25-year warranty against structural deterioration and acrylic dome defects.
- Electronics: Actuator motors, remotes, solar panels, and rain sensors usually carry a 1-year warranty.
Actions That Void Your Skylight Warranty
- Driving nails through copper or specialized metal flashing aprons.
- Failing to fasten the curb with 1½-inch minimum wood penetration.
- Omitting required ice-and-water underlayment membranes along the curb sidewalls.
- Using incompatible acid-cure silicone sealants that degrade acrylic domes or factory seals.
When you need dependable, high-quality roofing and skylight installations throughout Central Illinois—including Effingham, Vandalia, Shelbyville, Beecher City, Ramsey, Salem, Hillsboro, and Litchfield—our experienced team at Mid-State Construction & Roofing, Inc. is here to help. Schedule dedicated altamont roofing services or contact us today to book your free roof inspection and ensure your home stays bright, energy-efficient, and completely watertight.